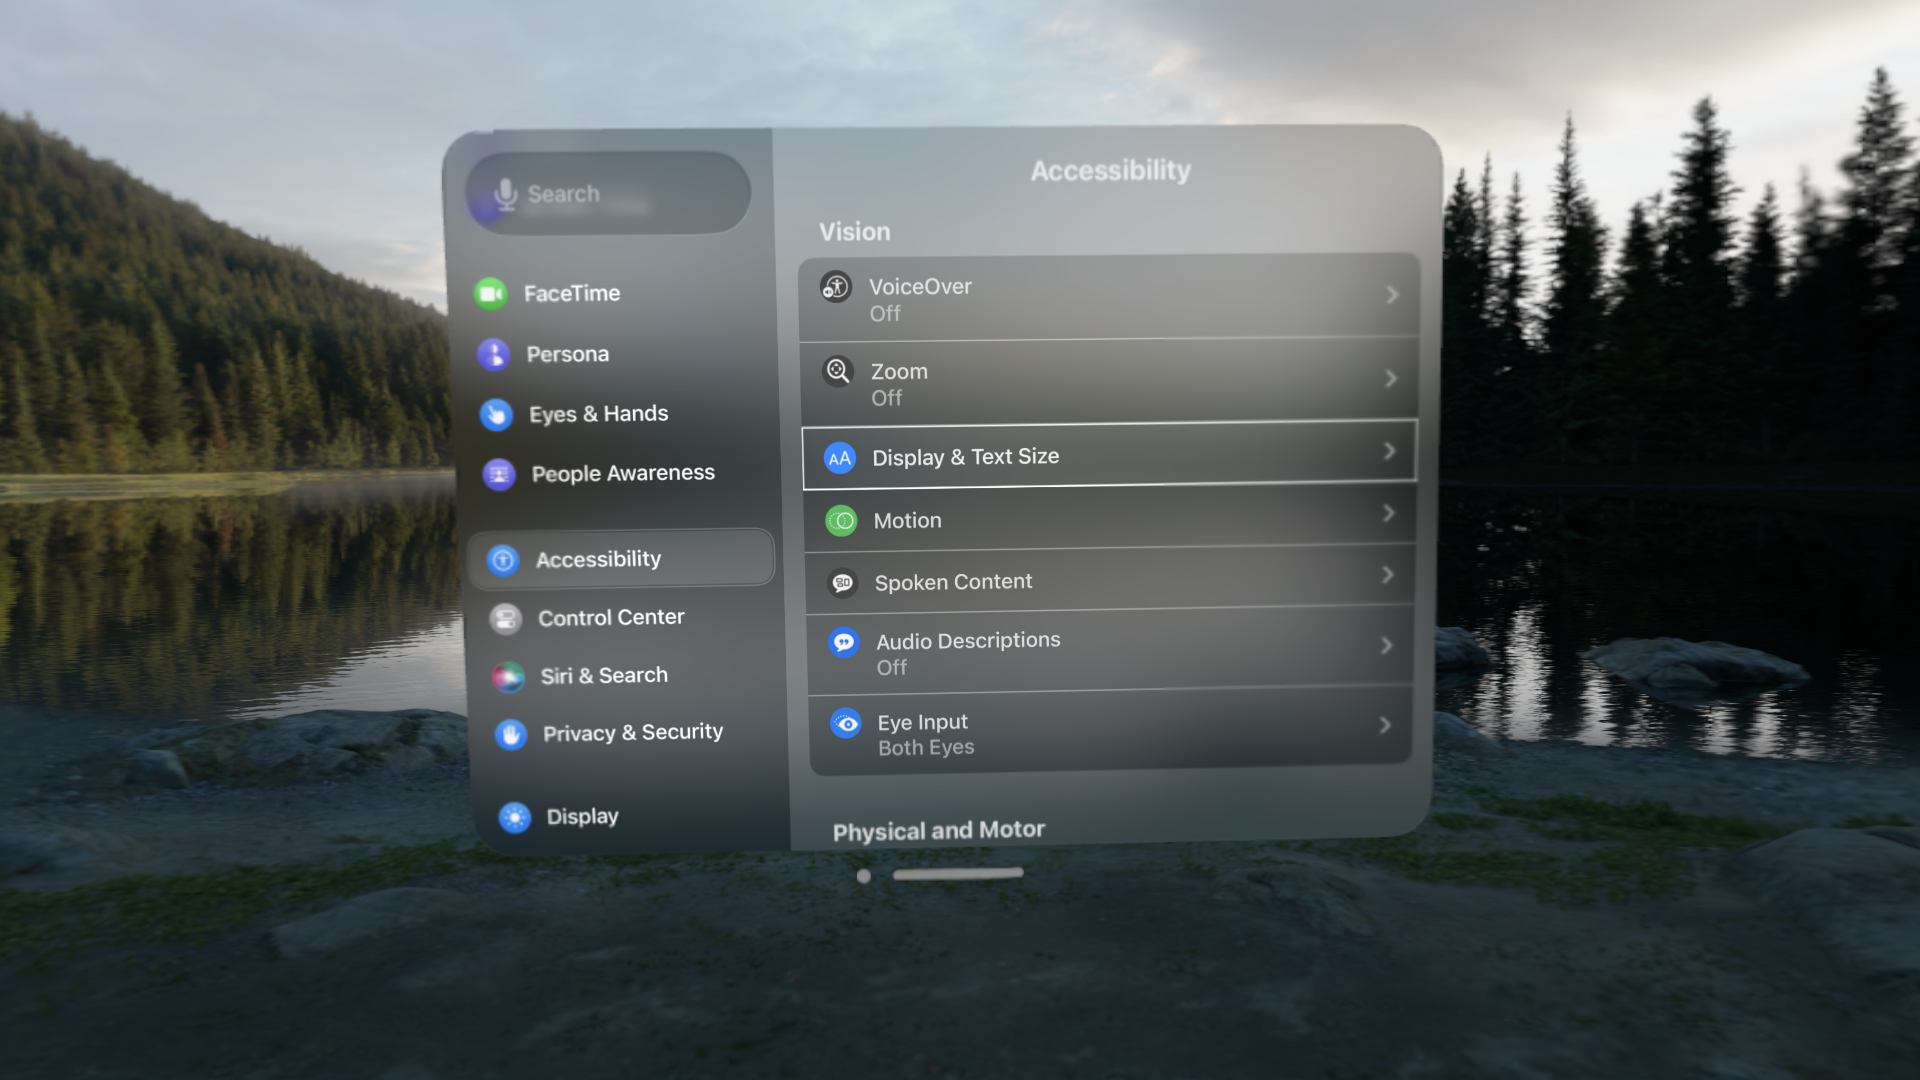
Vision Accessibility on Apple Vision Pro
I have low vision. A kind you can’t really correct for with glasses or contacts. I also bought Apple Vision Pro at launch. Why would I do this? Well because I’m a nerd who wants to see the future, but also because I was fascinated to see how Apple would handle accessibility for this new product. Apple’s track record on accessibility in the past decade has been stellar1, in my opinion, with their teams adding powerful options every year and ensuring every new platform has accessibility support built in from the start.
After watching Apple’s WWDC23 session on visionOS accessibility, I knew accessibility on visionOS was an important point for them. But even after consuming as much information on the platform as I could, I knew I had to try it for myself to know the answer to the important question: how well does it work for me?
n.b. Before I begin, I want to make clear that these are only my impressions. There are many different ways vision impairments and disabilities can affect how someone experiences technology and the world, and I can only speak to my own experiences.
Input
On any computer system, how you interact with it is critical, and it’s one of the things that sets Apple Vision Pro apart from other devices (and even other VR headsets). Apple’s tech specs page describe input as relying on “Eyes, Hands, and Voice”, so let’s start there.
Eyes
This is probably the biggest input innovation in the product—you just look directly at what you want to select! (I recommend watching Apple’s guided tour video if you aren’t familiar with how this works). But that paradigm can quickly break down with various eye conditions. One aspect of my vision is nystagmus, or uncontrollable eye movements. I generally don’t actively notice this, apart for possibly having more trouble focusing quickly on some things at times. But I could very quickly tell that it would cause Apple’s eye tracking system to work less than ideally (Apple does specifically call out that users with nystagmus may have issues).
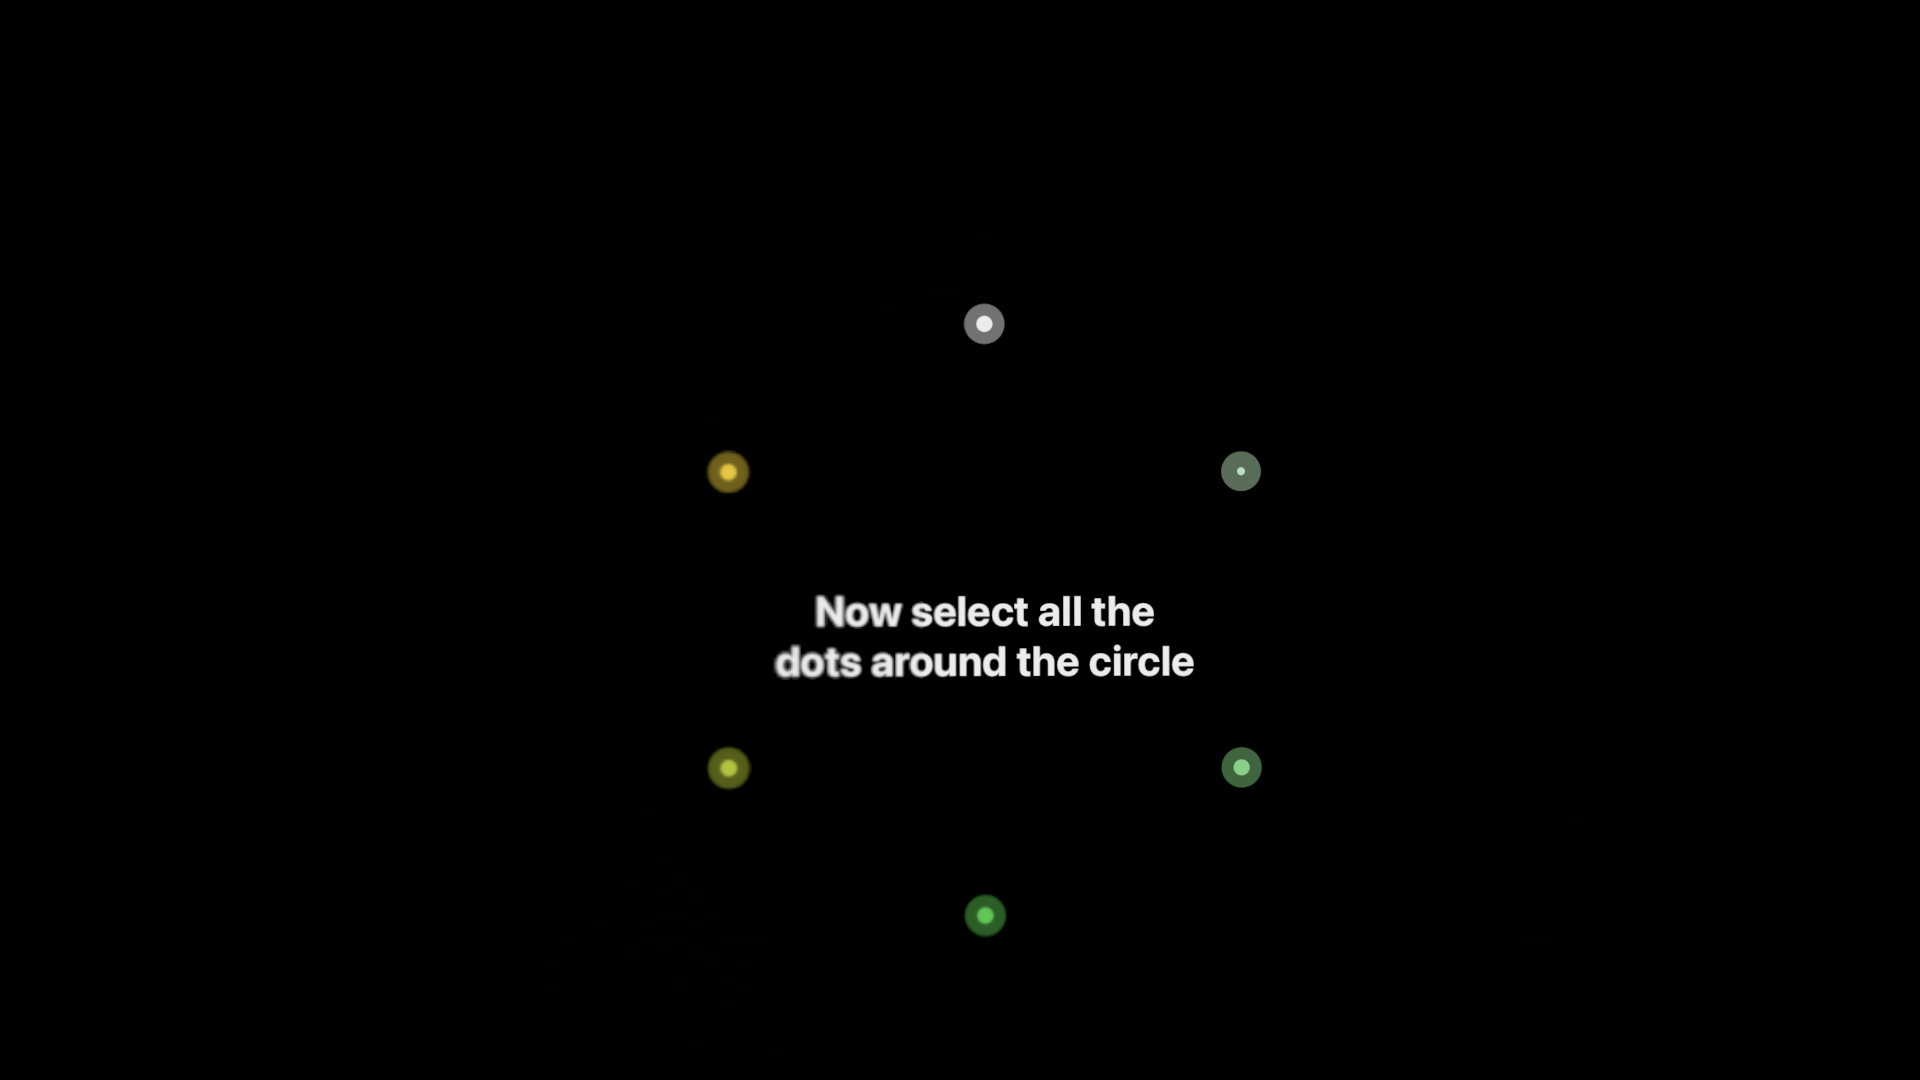
Eye Setup in visionOS requires you to look at and select dots in three different lighting conditions. The darkest lighting condition is pictured here.
Some things work great. I can very easily select an app from the Home View or scroll the massive Runestone window that I’m typing these words into right now. But it doesn’t take long to encounter issues. For me, that generally involves having many selection targets close together. That includes many toolbars (eg getting to the “Tab Overview” button in Safari), the virtual keyboard (when using look-and-tap), and even, at times, the close window button.
Can you tell which button I’m trying to look at?
That said, it’s far from unusable. I can still generally get around most things OK, but it’s clear that some interactions are harder for me than they are for others.
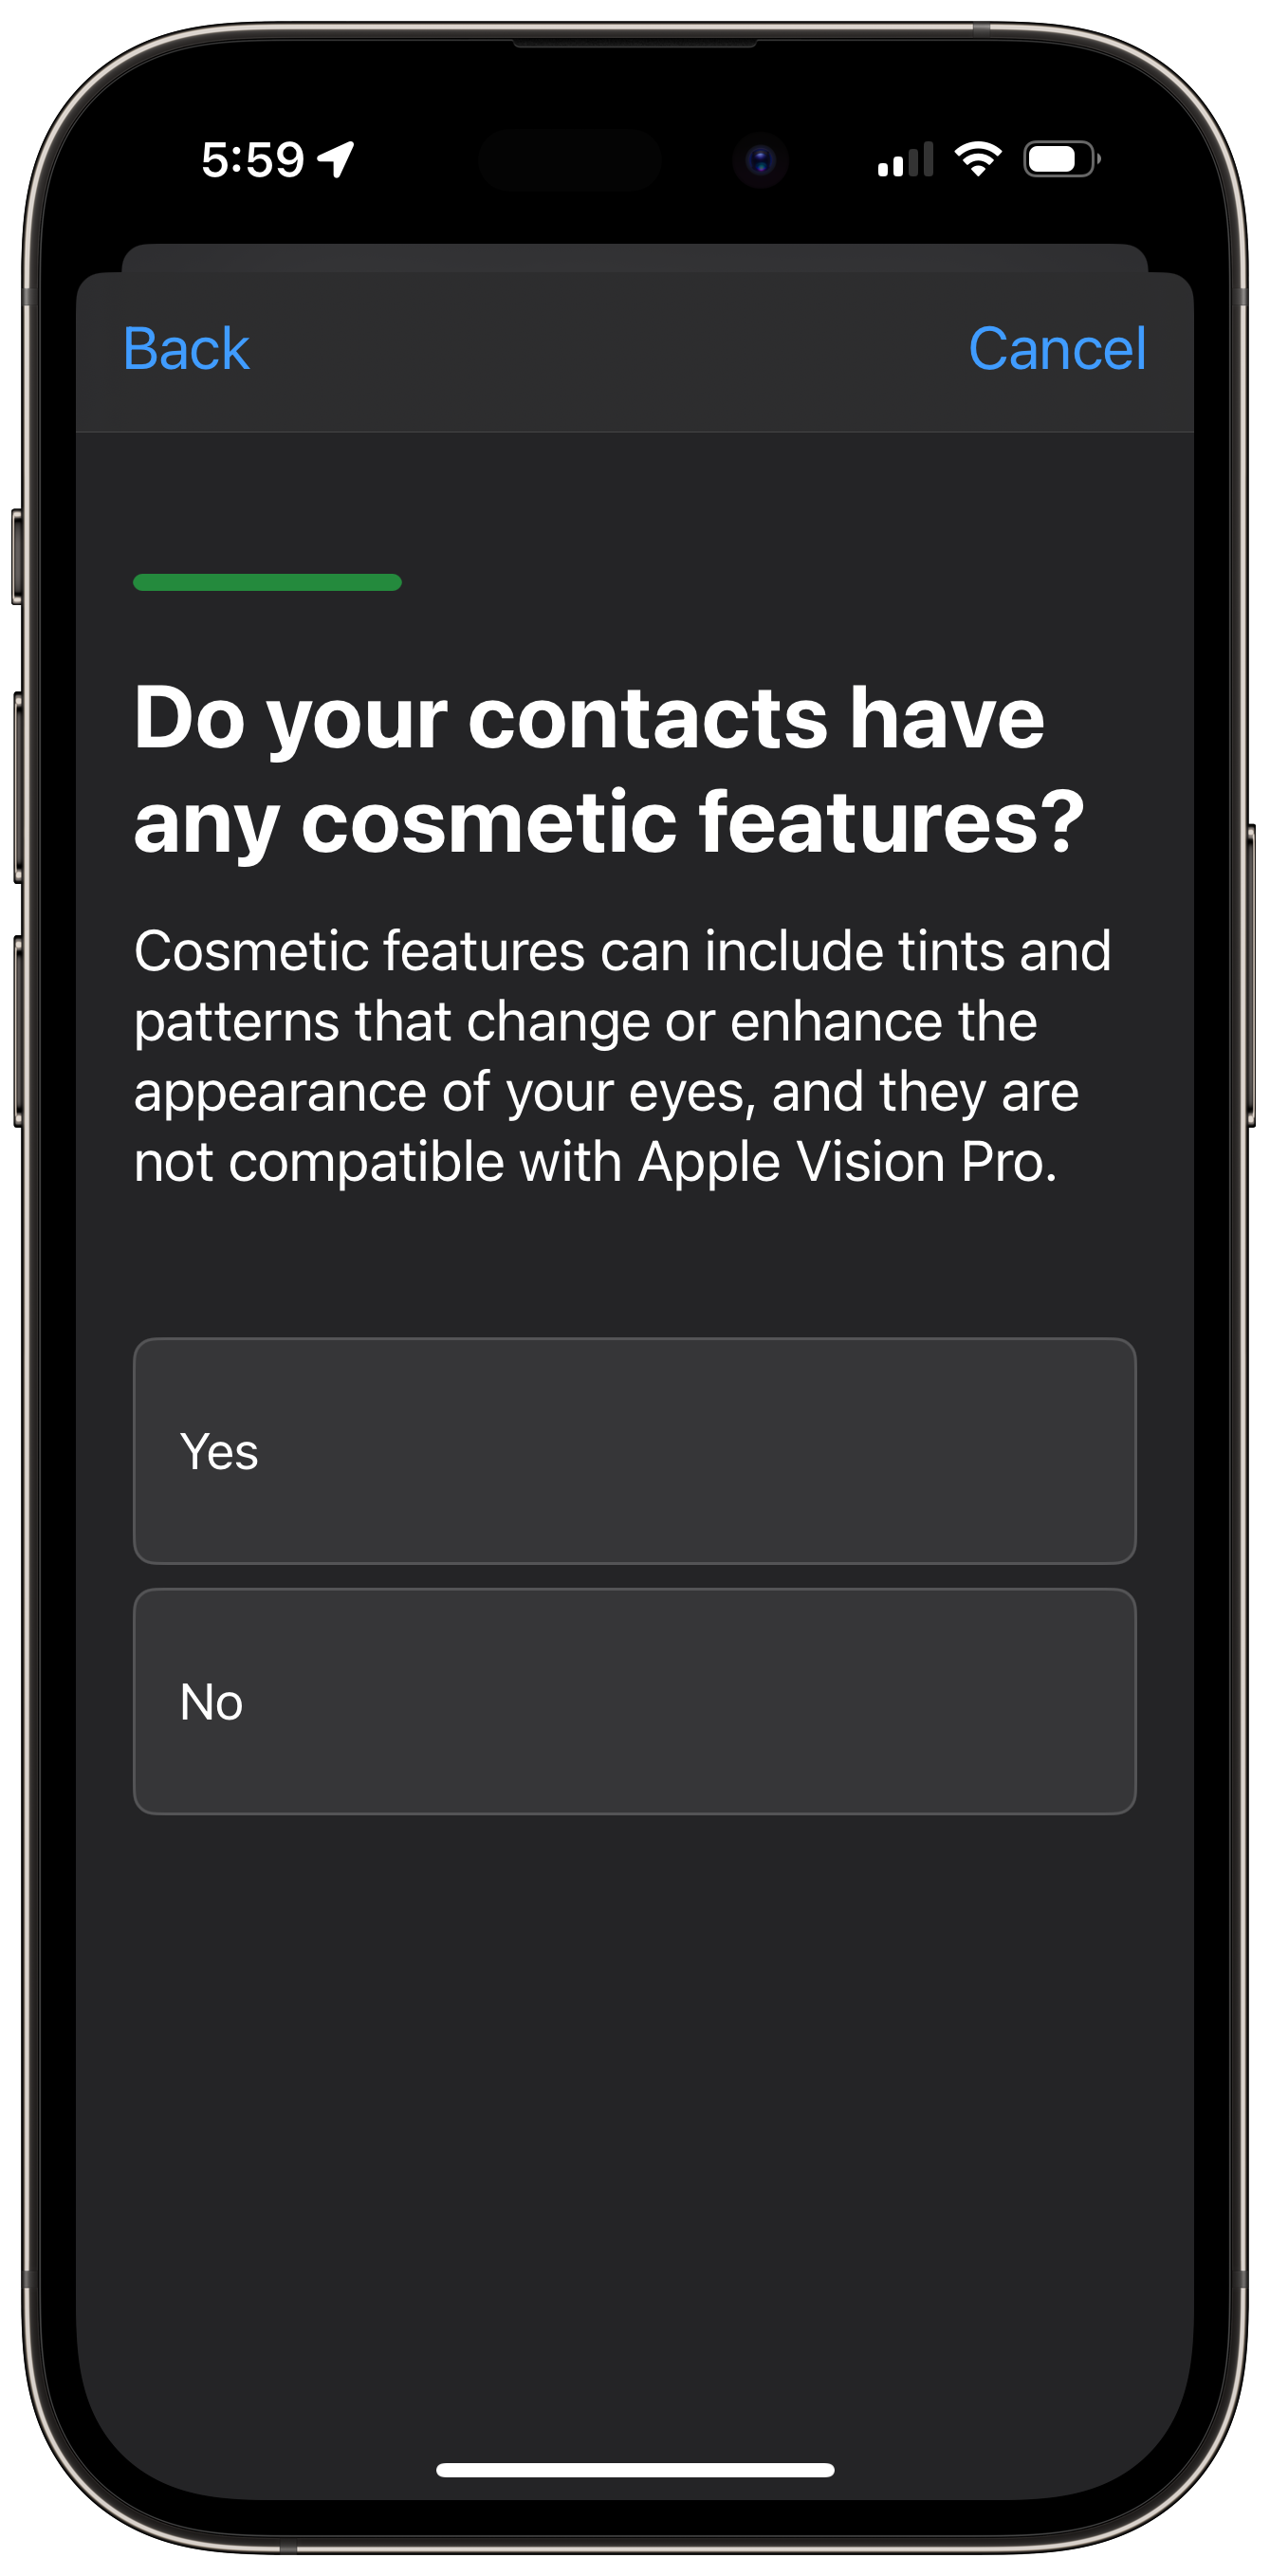
I also generally wear tinted contact lenses to help control the amount of light going into my eyes2. When purchasing Apple Vision Pro, you’re presented with a series of questions about your vision and whether you wear glasses or contacts. One of these asks about whether you use contacts with a tint. If you say yes, it tells you that you can’t use these with Apple Vision Pro. But I’ve found that’s not entirely true.
I’ve tried using my Apple Vision Pro both with and without my contacts, and can get the eye tracking to work fine with either… with a catch. Using my calibration from one configuration doesn’t work properly with the other (I could launch some apps from the Home View, but not much else). So if I last used it with my contacts, I need to re-run eye setup to use it without them. Luckily, there’s a shortcut for this. Quadruple-clicking the Top Button will start eye setup, making it easy to get into without having to dive into Settings. I do wish they’d allow me to save two eye setups (a feature they already provide for users who may use Apple Vision Pro both with and without ZEISS Optical Inserts), but re-running setup isn’t a huge pain.
Interestingly, Optic ID works with either configuration without need for re-registration, which was a relief for me, as it means things protected by the secure enclave (including my Persona) don’t need to be reset.
Hands
Eye tracking is good and all3, but you generally only use your eyes as a pointer, with your hands acting as the “mouse button”. And I’m glad to say I’ve had effectively no issues there, save for having to remember not to accidentally have my finger and thumb touching and to have my hands in view of the cameras.
It’s also worth noting that, for almost all visionOS UI, you can also directly touch any UI element if it’s close enough to you. This often isn’t practical, as most windows will be further than arm’s reach away, but it can be handy for a webpage or iPad app with odd tap targets. Most users will probably use this most often with the virtual keyboard, but it’s always worth keeping in back of mind in case something can’t be reached with the typical look-and-tap approach.
Siri and Dictation
Siri has nearly all of the same abilities it has on iPhone and iPad, but it is extra useful in Apple Vision Pro to control windows. You can tell Siri to open or close an app, or even to get rid of everything in your view. This is extremely convenient, and really helps when navigating the system. I will frequently ask Siri to open something like 1Password or Safari if I need to check something quickly while in the context of another app.
Additionally, dictation is built deep into the OS. Nearly every search field has a microphone which, if you stare at it long enough, will let you speak your query into it. This is a pretty neat idea, but it seemed to sometimes stop listening if I looked away soon after it started listening to me—resulting in the dictation session being cancelled. That may just be some 1.0 bugginess, though.
But that’s not all! The virtual keyboard, as well as the QuickType bar that hovers above physically connected keyboards, also has a dictation button, and that one acts as a toggle. Tap it once to start dictation, and again to stop. This works great, and exactly how you would expect it to.
Alternative Inputs
So that’s what you have out of the box, but Apple provides many alternative ways to interact with the system as well. Not all of these are specifically targeted towards aiding those with vision disabilities, but they all felt worth investigating to compare the benefits and drawbacks of each.
Keyboard and Trackpad
This isn’t even marketed as an accessibility feature. Connecting a Bluetooth keyboard and/or Magic Trackpad allows you to control apps just as you would an iPad.
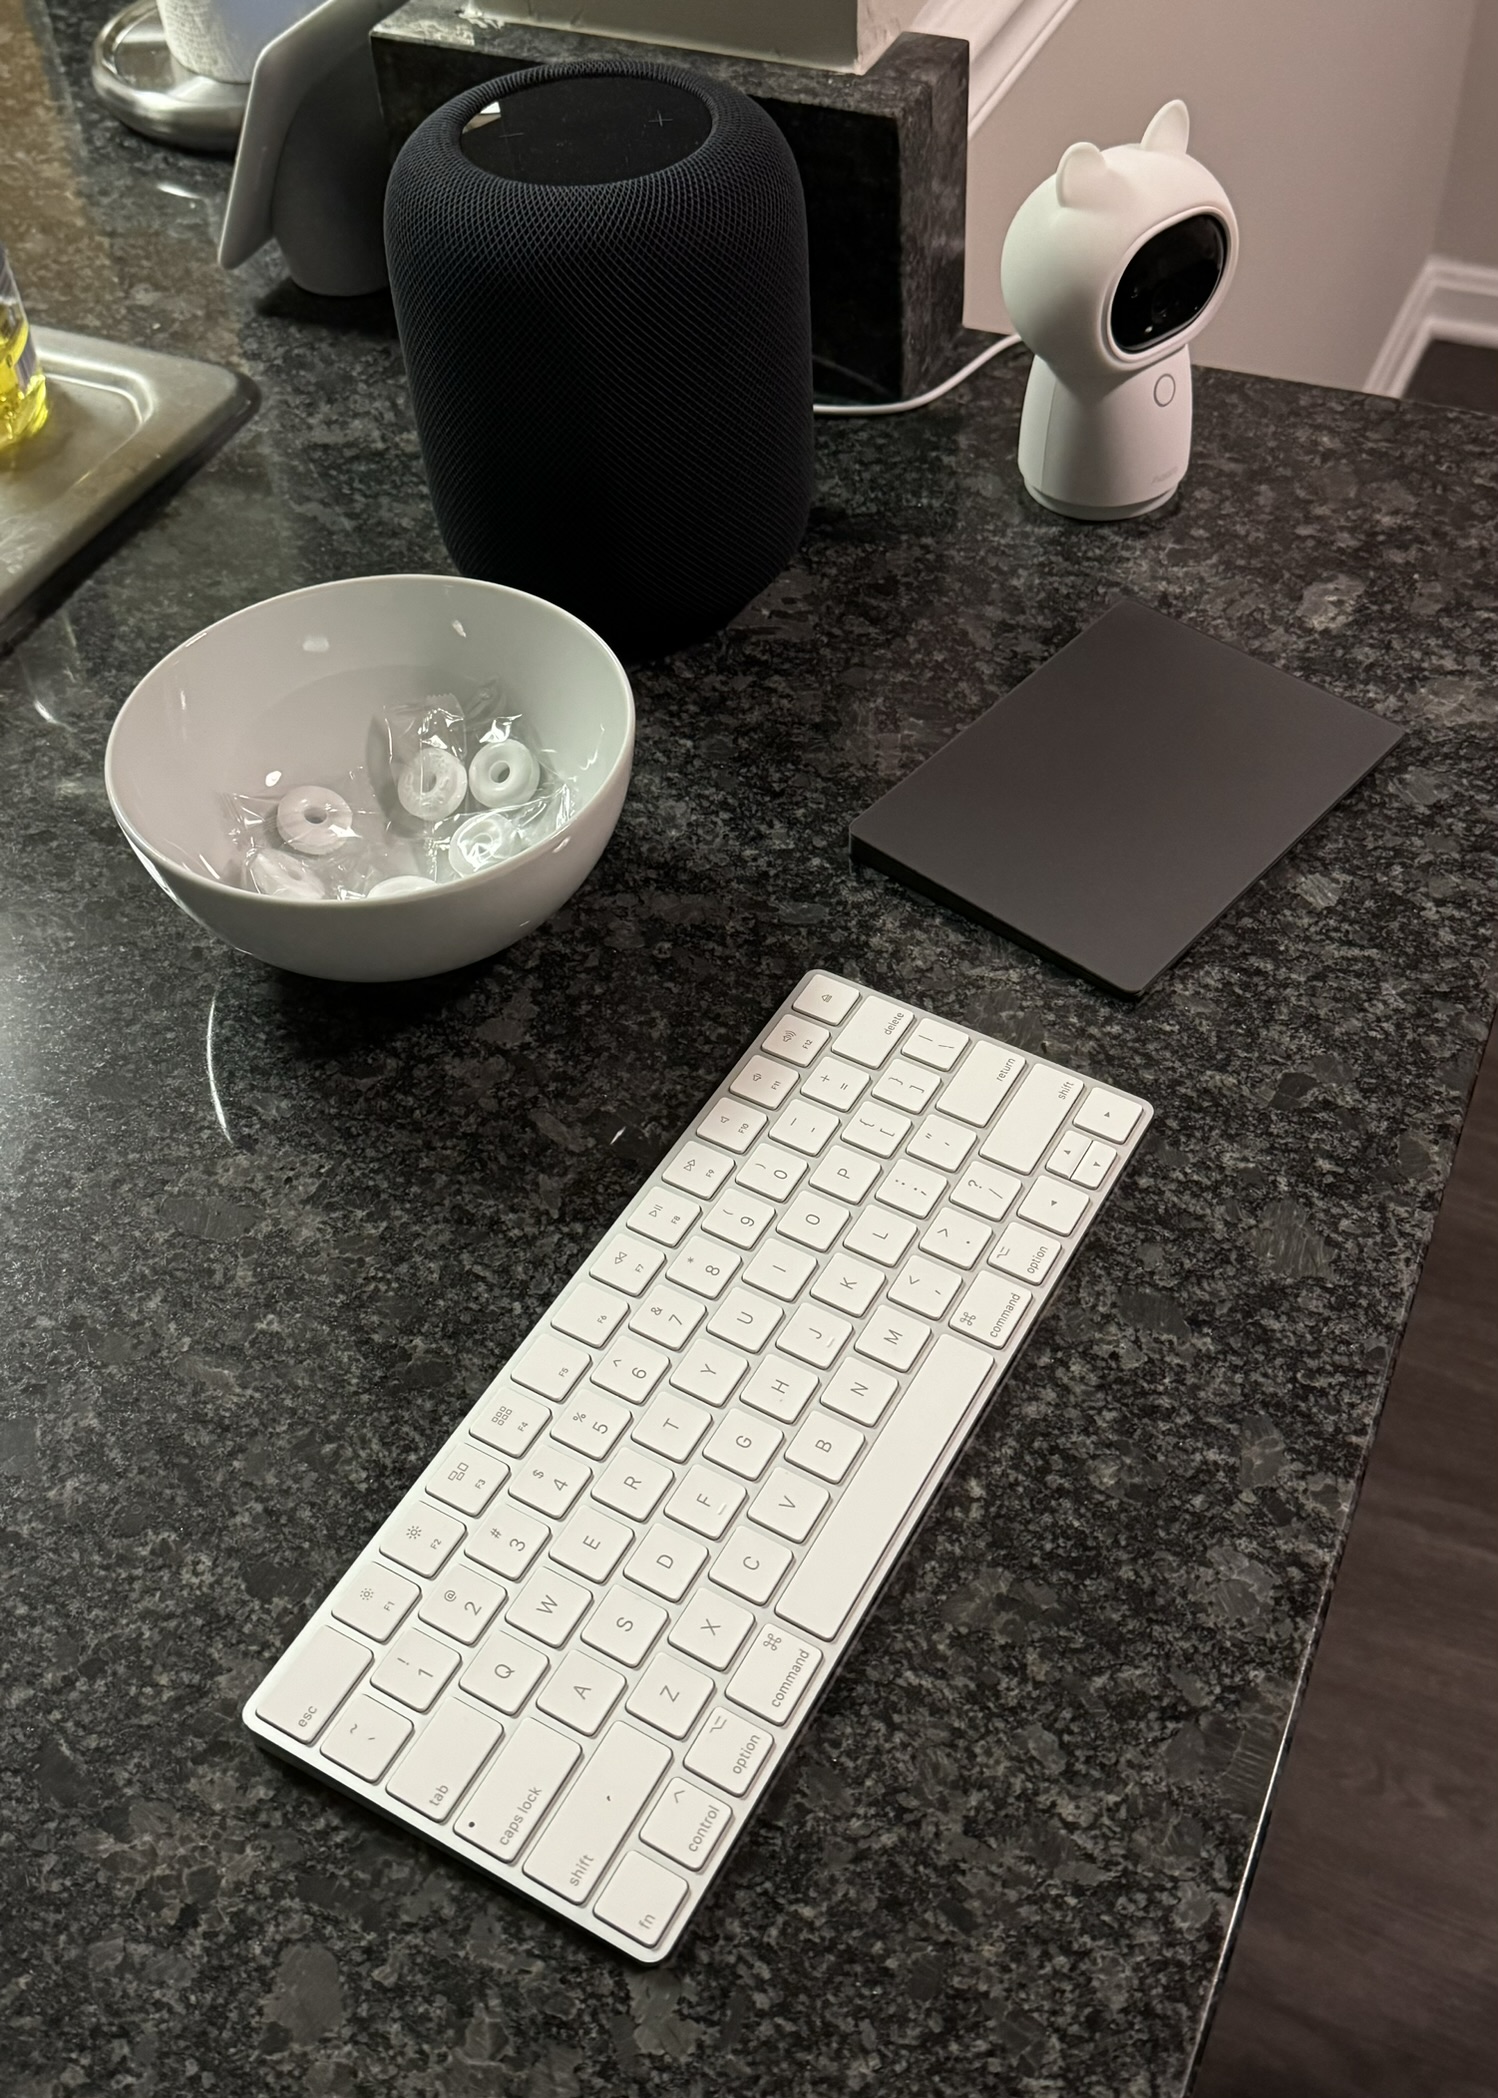
I’ve been keeping a keyboard and trackpad on my kitchen counter for use with my Apple Vision Pro. It’s a bit odd, but I don’t really have any better place to put them when not in use.
I find a physical keyboard critical for writing anything longer than a quick search, password, or web address. A trackpad is probably less important, but is still nice to have when managing text selections or interacting with iPad apps that don’t scale as well. It does completely mitigate my eye tracking issues, since I can directly select a control with my trackpad if needed. But, of course, using either a keyboard or trackpad requires you have the desk space to accommodate these peripherals, which may not be true if using the device in a more relaxing environment like lying on the sofa.
Everything you know about how keyboards and trackpads work on iPad transfers to Apple Vision Pro. You can hold Command to get an overlay of keyboard shortcuts. You can use Command-Space to open Spotlight (which is also accessible via Control Center). The trackpad cursor will jump from element to element (though less often than on iPad, as elements tend to be larger). It all just works.
The downside, of course, is that you now have to deal with a separate keyboard and trackpad. Do you keep them on a spare desk? Do you pack them with you when you take Apple Vision Pro on the go? It’s a hassle.
Pointer Control
When your physical trackpad isn’t nearby, you can use Pointer Control. Pointer Control allows you to control a virtual cursor, much like the one you can control with a trackpad, using different parts of your body.
- Eyes: This puts a cursor where you’re looking. It is not at all useful to me, and definitely shows the jitter that the eye tracking sees in my eyes more directly. I could absolutely see it being useful for those with different accessibility needs though.
- Head: This puts a head-locked cursor in the center of your view. This is easily the most stable of all of these options, but is more fatiguing as you have to move your head to select anything.
- Index Finger: This puts a cursor where your finger is pointing. It’s very fast, and feels pretty sci-fi, but falls down a bit in usability for me. Since you’re using your finger to point, it isn’t practical to use the same hand to also select an item, so you have to coordinate between both hands.
- Wrist: This puts a cursor where your wrist is pointing, and feels like the sweet spot between head and index finger to me. It’s not quite as stable as head tracking, but not nearly as fatiguing. It’s not quite as fast as index finger tracking, but lets you use the same hand to select an item as you use to point. Interestingly: Freeform uses a very similar gesture to wrist-based Pointer Control for drawing on the canvas
With both of the hand-related options, you can also add a ray going from your hand to the cursor, which can aid in keeping track of where the cursor is.
None of these options are as “magical” or quick as using eye tracking, but they can be handy to toggle on if I find myself in an app with a harder-to-use interface. Ultimately, Pointer Control is probably the most useful accessibility feature for those with nystagmus.
VoiceOver
A screen reader in a device designed around vision? You bet. VoiceOver reads content and information about UI elements aloud, relying on many different hand gestures to perform different actions without needing to see the displays4. You can tap your right index finger to move to the next element, your right middle finger to go back to the previous element, and your left index finger to select the highlighted element. You can also hold fingers on one hand while tapping with the other to switch apps or use the Rotor (a concept borrowed from iOS allowing you to quickly change the way VoiceOver steps through elements). Additionally, you can enable an “exploration mode”, allowing you to move your head to find different visible UI elements. VoiceOver also uses spatial audio to help you locate where the element or app that is speaking is in your physical space.
Make sure your sound is on for this video.
While I think it’s extremely impressive that they were able to ship VoiceOver on such a different product with zero physical input devices, I feel it may be a bit fiddly, at least for a newcomer. When I tried it, I found myself getting a bit lost. I was often using the wrong gesture and going somewhere I didn’t intend. This was particularly notable when multiple apps were open. Trying to figure out what I was controlling and why focus was moving around between apps felt pretty confusing at times. It certainly feels very powerful, however, and I imagine somebody, given enough time to learn how to best utilize it (and maybe a few software updates on Apple’s end to smooth out some of the rough edges) could make great use of VoiceOver in their workflows.
I don’t personally use VoiceOver much at all on any platform, as my vision isn’t poor enough to require it, but I try to stay proficient at navigating the system with it. It completely changes the way you interact with your device, whether that be a Mac, iPhone, or Apple Vision Pro, and using VoiceOver helps me to think about app design in a more inclusive way.
One potentially incredible feature of VoiceOver that I couldn’t seem to get working is “describe passthrough” which, if Apple’s descriptions are to be believed, will describe with spoken words what you are looking at in the real world. You can do this on iPhone in the Magnifier app, but having that ability in a head-mounted display would be truly next level. I hope this feature gets working in future software releases.
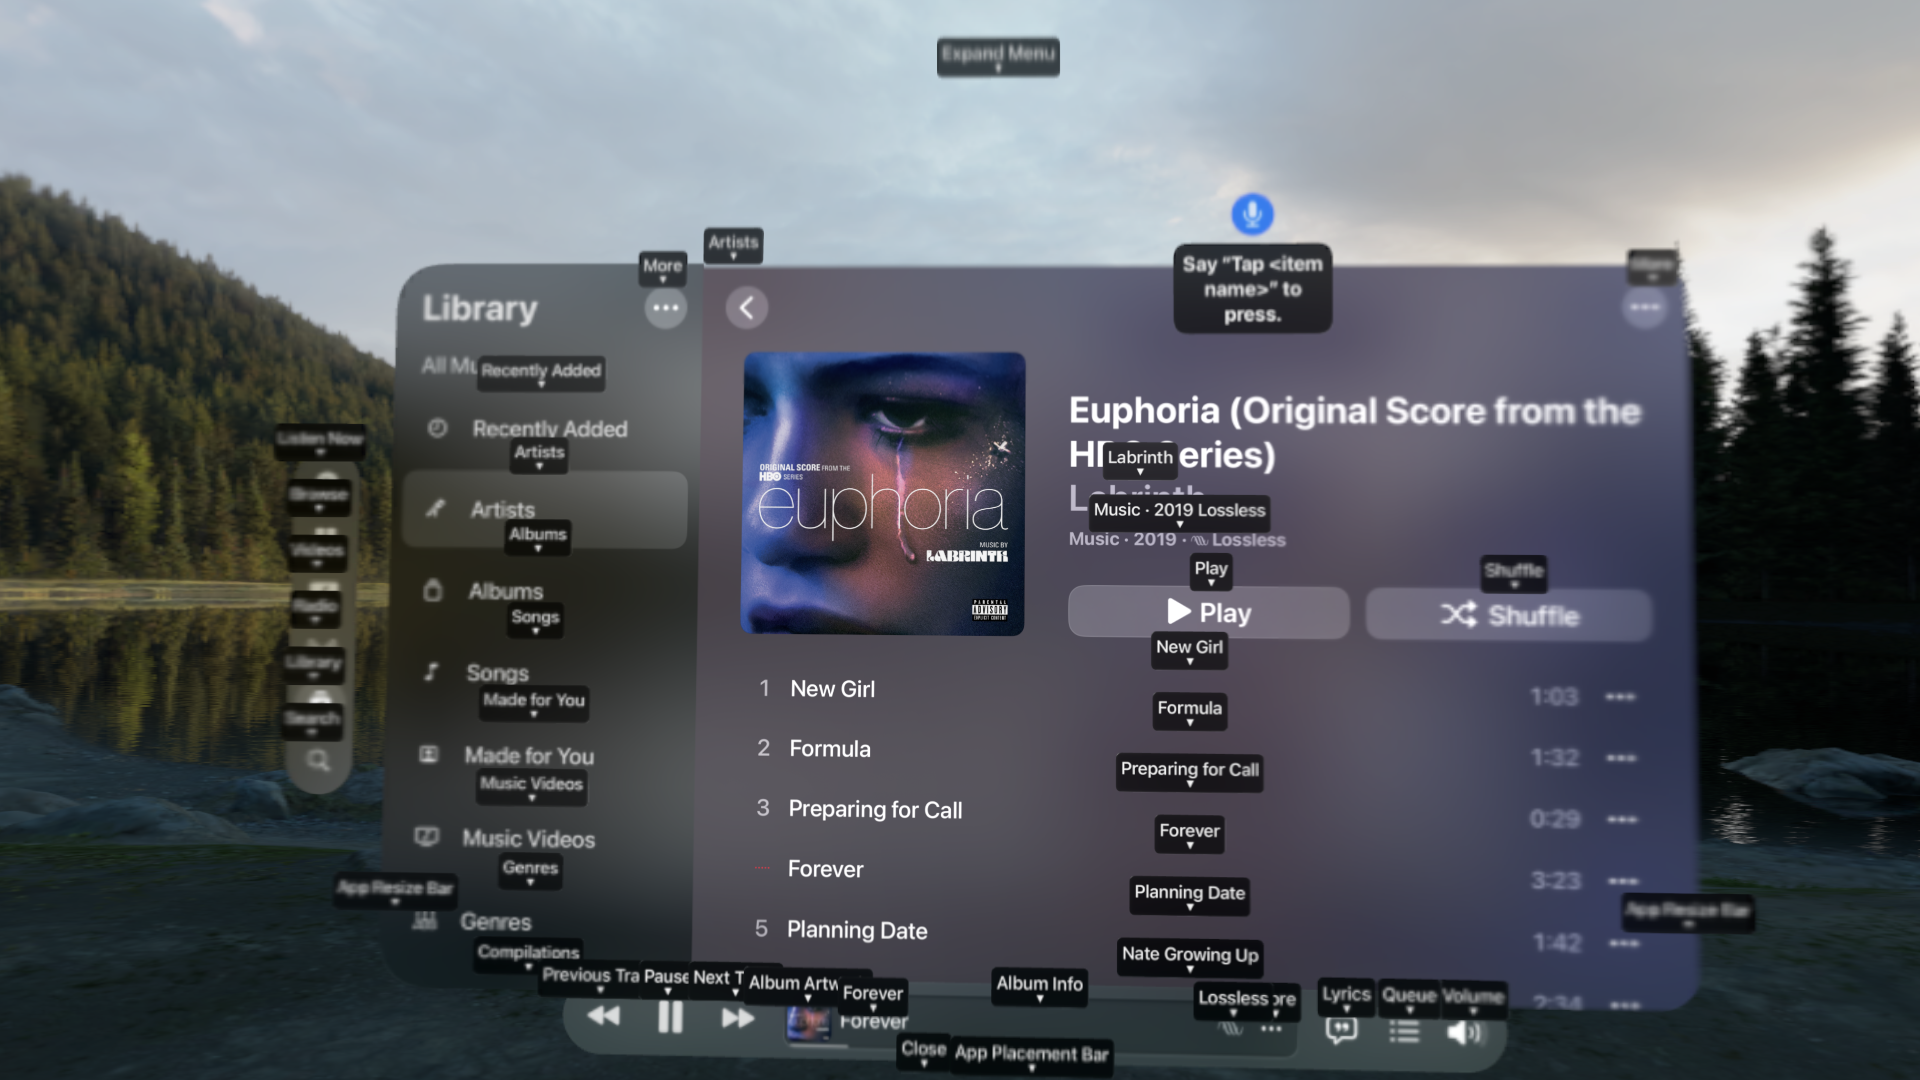
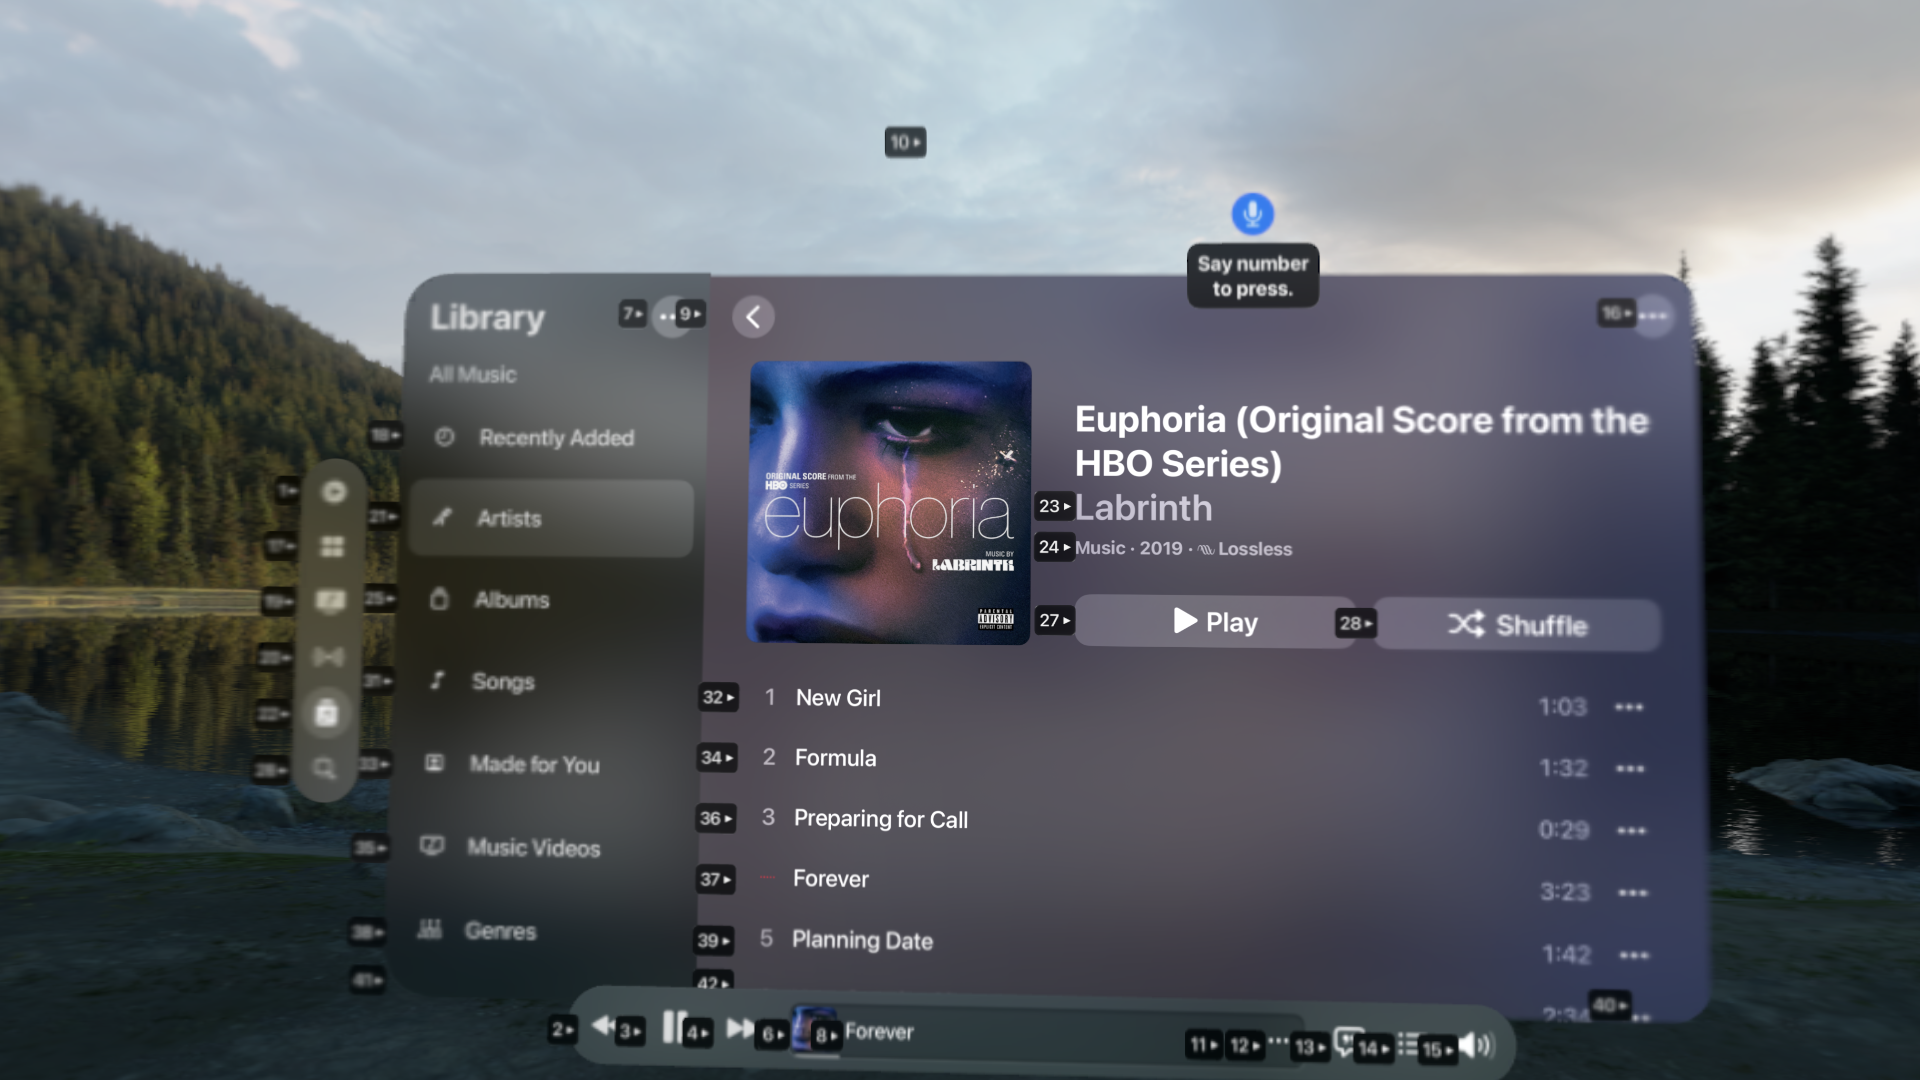
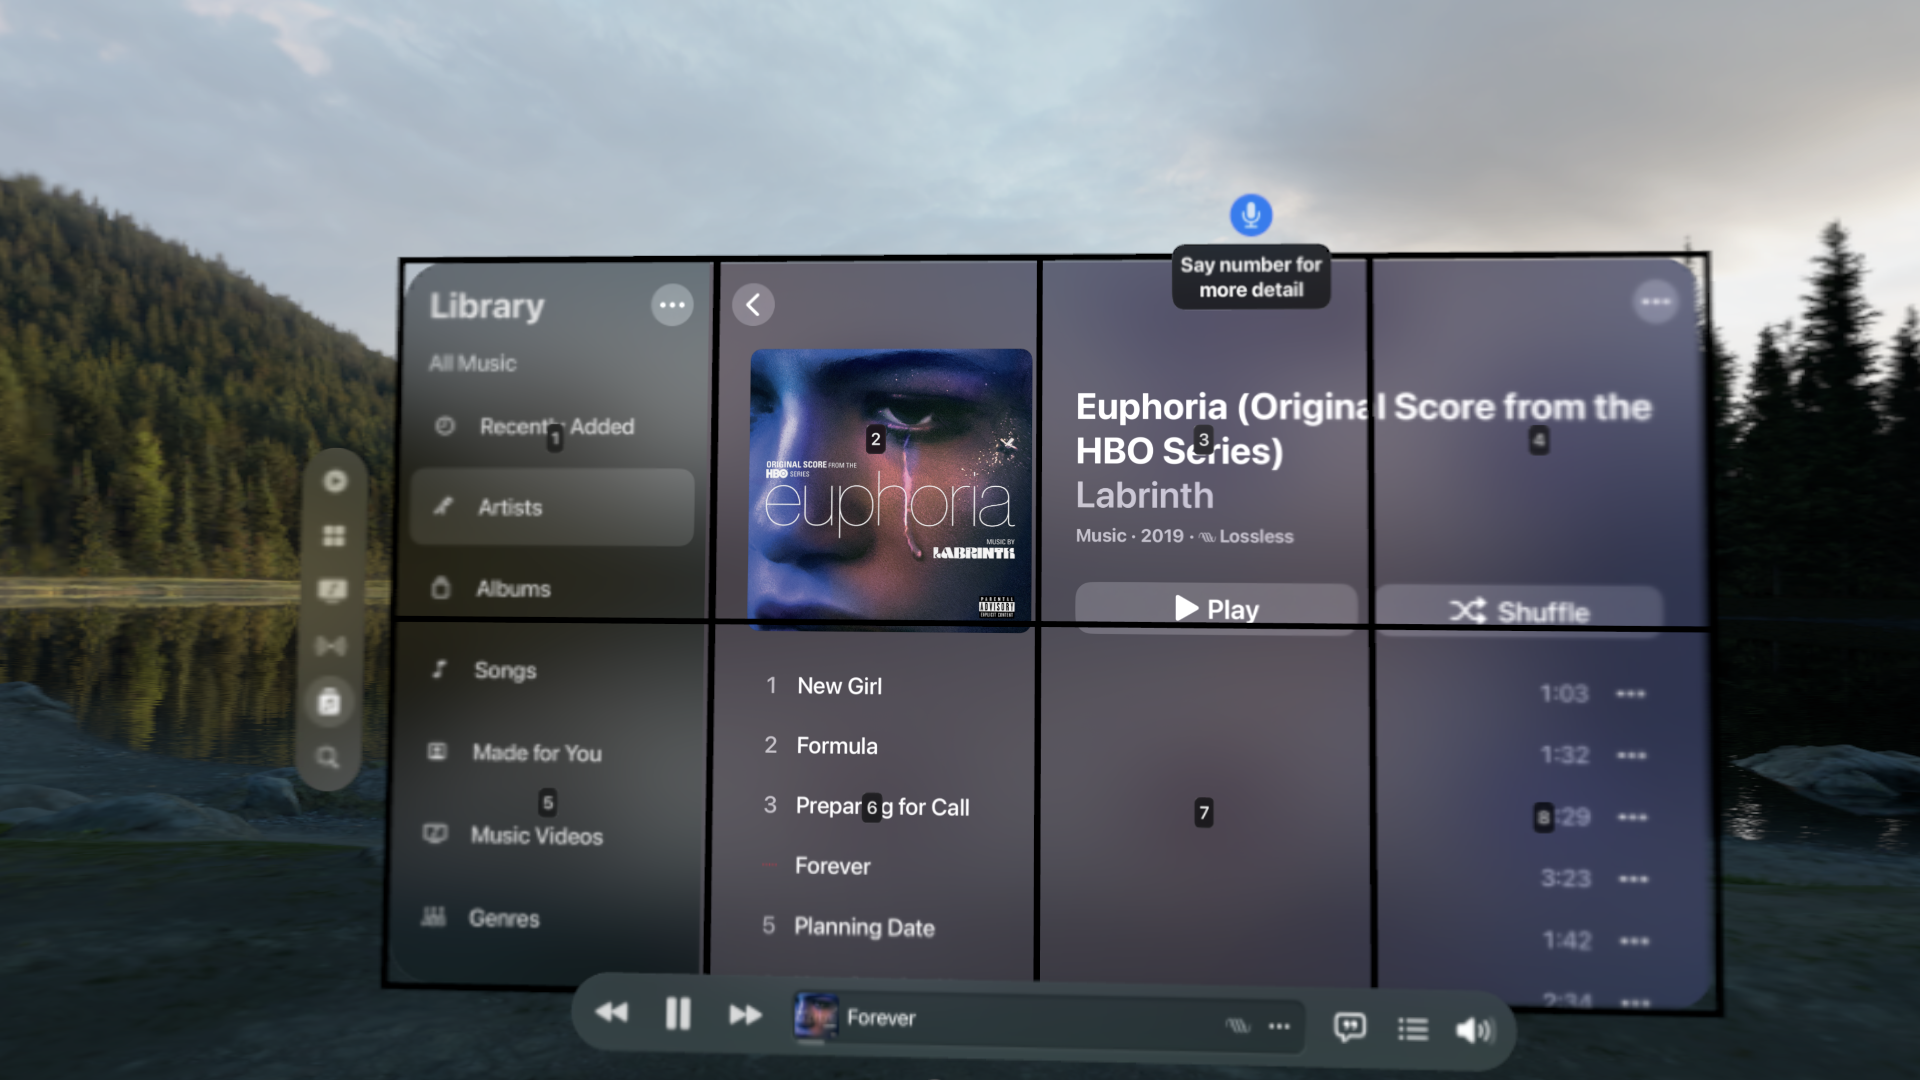
Voice Control
Much like on iPhone, iPad, and Mac, Voice Control allows you to select effectively any UI element with your voice. And it works great on Apple Vision Pro too. You can call out “tap Search” or “close window” and it will promptly do so. You can also tell it to “show names” of selectable elements so you know what you can tell it to tap, “show grid” to tap a specific region with accuracy, or “show numbers” to see everything selectable even if they don’t have good accessibility identifiers. This is an incredibly well-built system that, while built for those with mobility issues, can also be useful if eye tracking isn’t working as well, as you can simply tell it to tap the button you intend to select5.
I don’t use Voice Control all that often, but it can be a nice alternative in some situations, particularly when I’m in a dim environment where the cameras have more trouble tracking my hand movements.
Sound Actions
This is a fun one. You can assign various actions to different sounds you make. You can open Control Center by making a “P-“ sound, or the Home View by making a “click”. This is a clever idea, but not one that I could seemingly get working. It couldn’t seem to detect the sounds I was making.

Accessibility Shortcut
Many of these input options—as well as many output options I discuss later on—have situational use for me. Useful to get at a particularly tricky to tap button or switch, for example. This is where the Accessibility Shortcut comes in handy. Much like on iPhone with a triple tap of the side button or a Mac with a triple press of the Touch ID/power button, triple pressing on the Digital Crown can either toggle a single accessibility setting or, if multiple are selected, present a list of settings to toggle on or off.
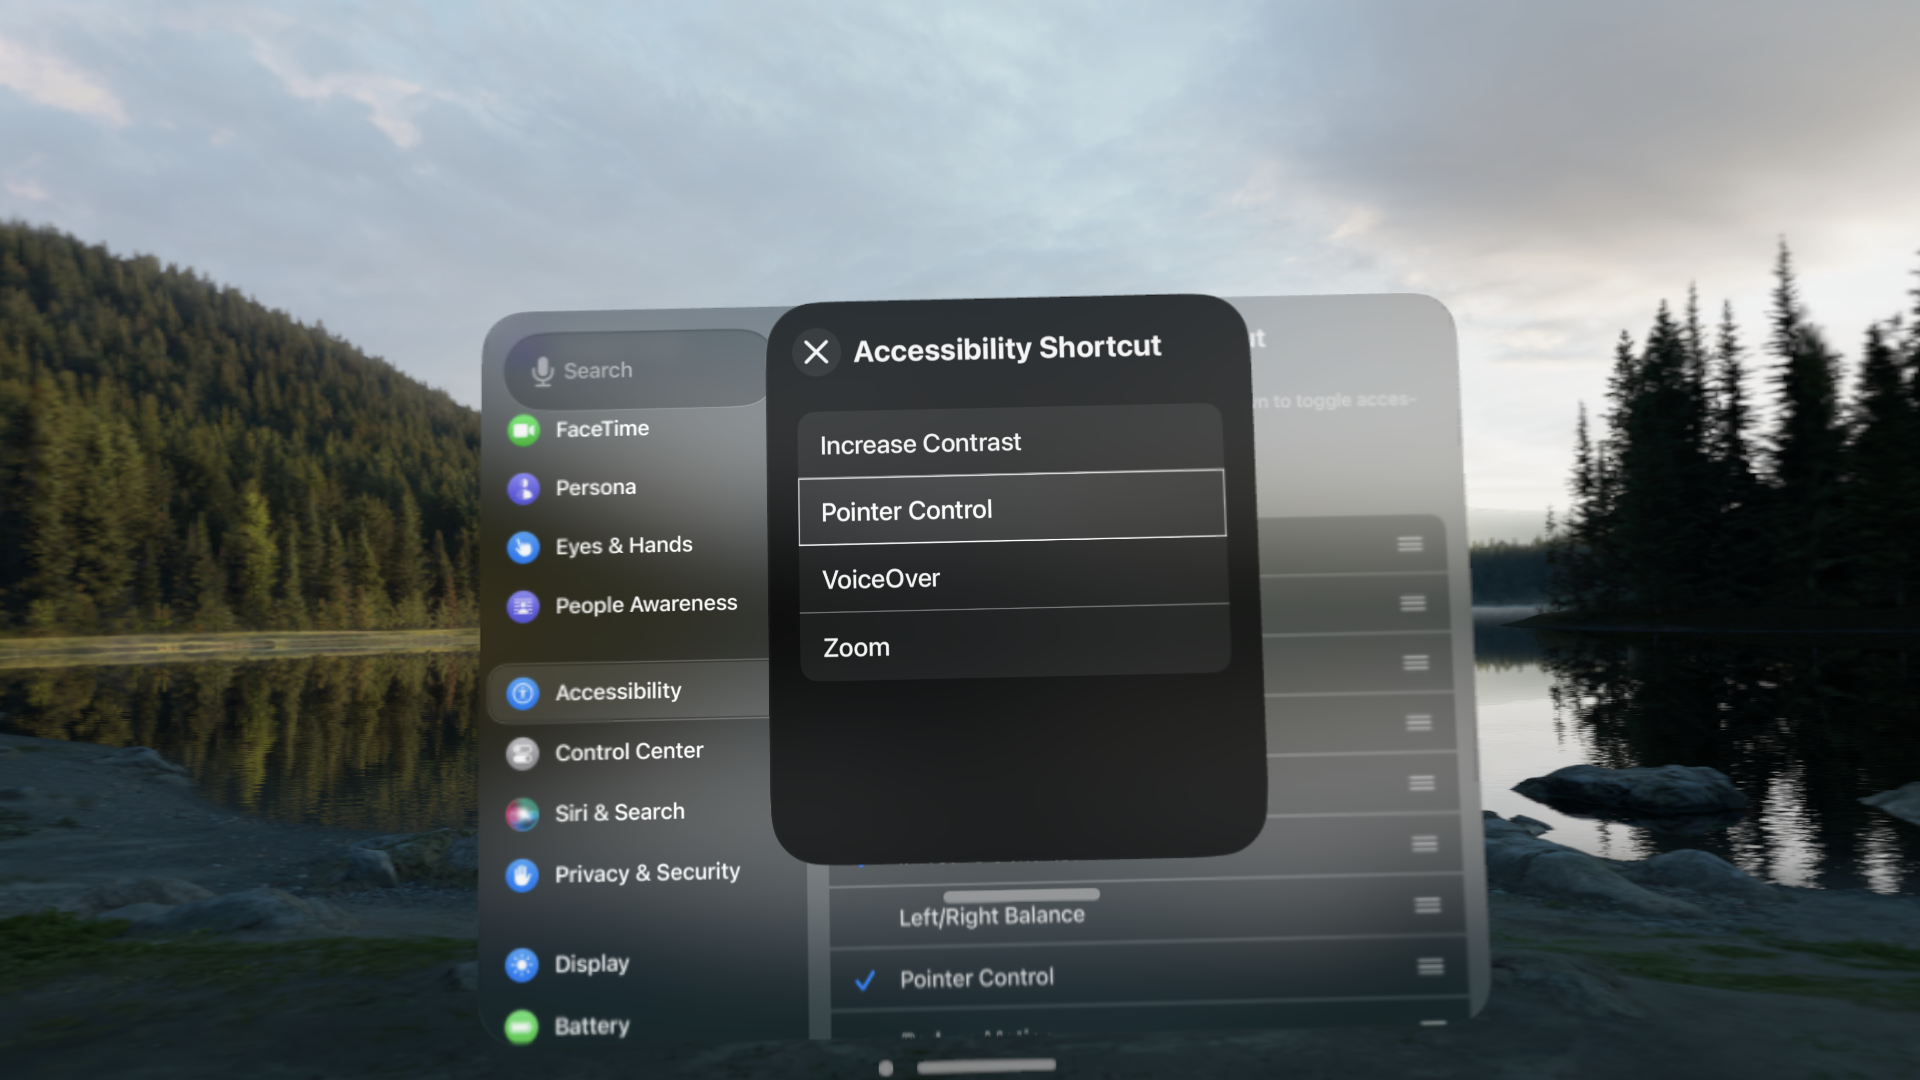
visionOS allows you to maneuver this list by turning the Digital Crown, making it usable even when your current input method is failing for you.
Output
Input is only half of the story. Just as important is making sure I can actually make out everything that is being displayed around me.
Windows
There are two kinds of apps you’ll encounter on Apple Vision Pro: compatible iPhone or iPad apps and native visionOS apps.
Compatible apps, which live in a special folder in the Home View apart from native apps, use their original iOS light mode visual style. Because these apps haven’t been updated specifically for Apple Vision Pro, their touch targets often feel a bit small, and may not have any highlights to track where you’re looking.
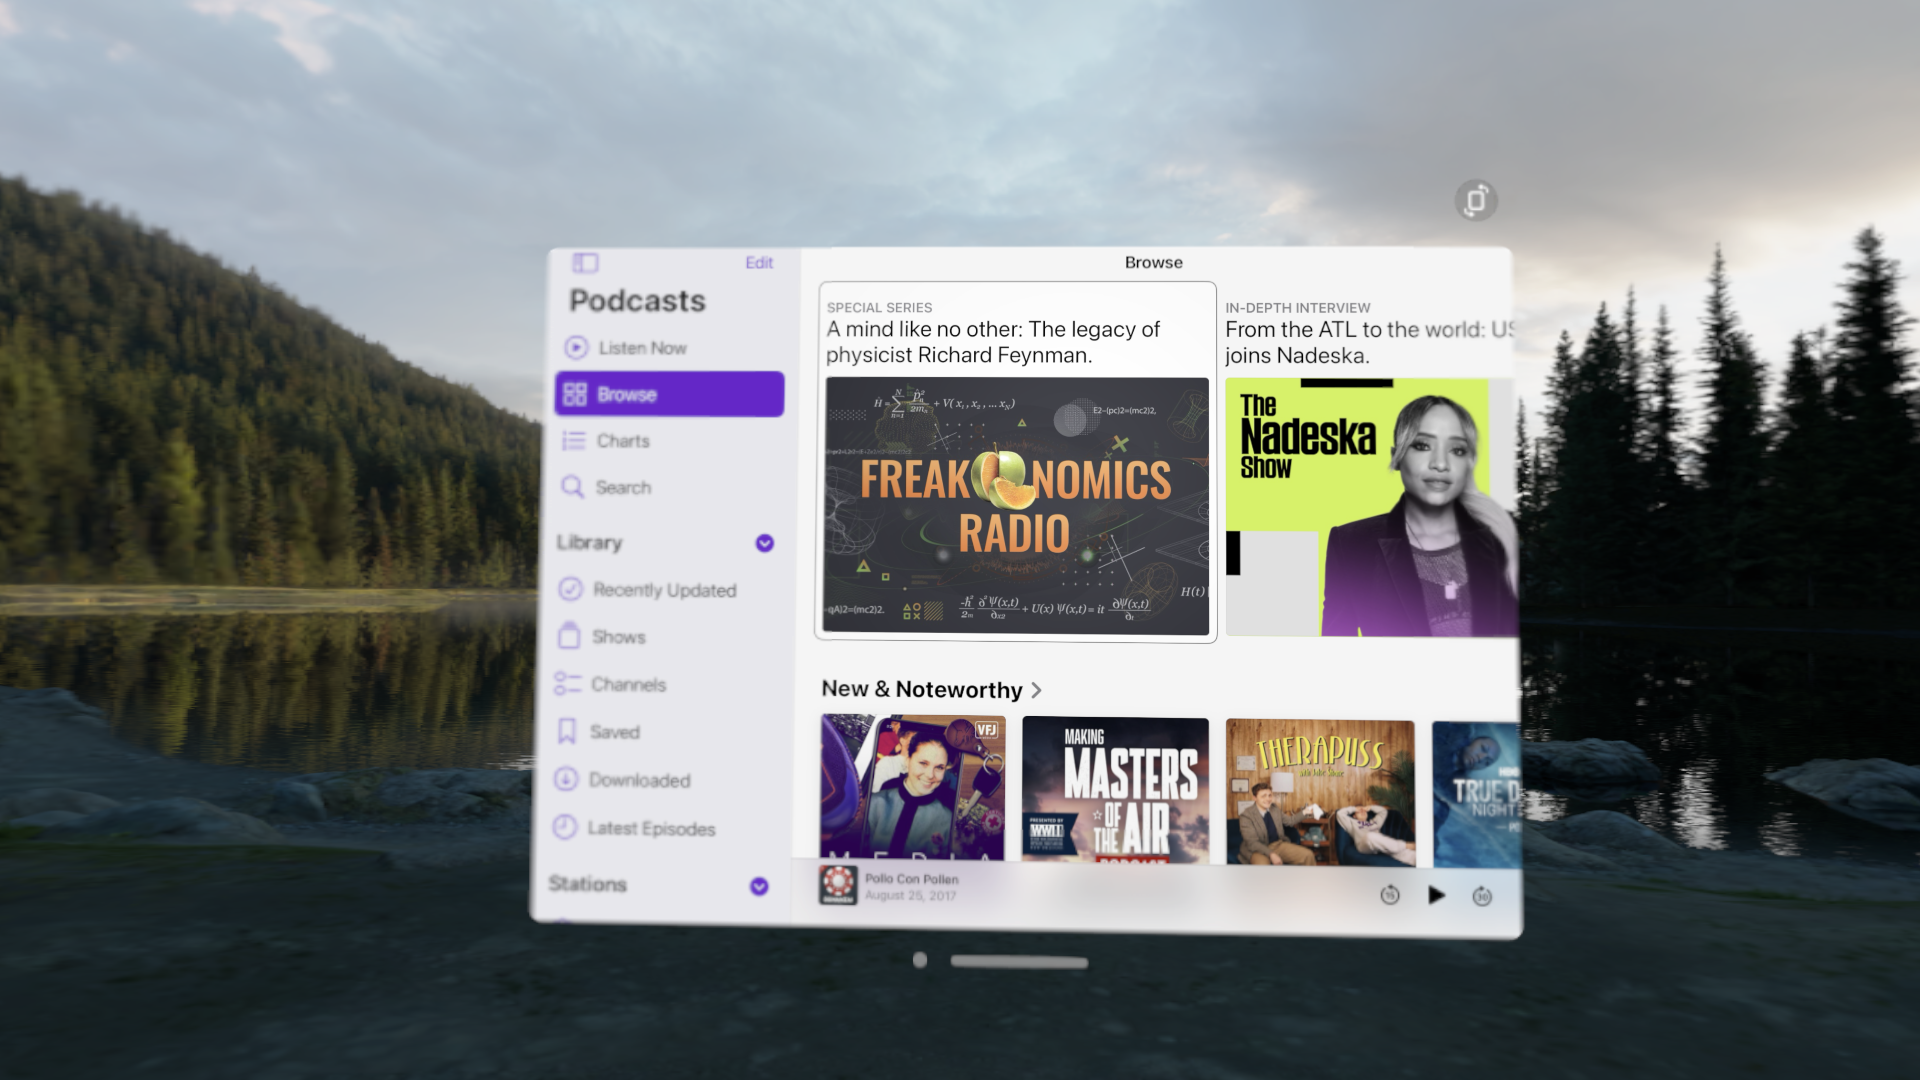
Apple Podcasts is a compatible iPad app
By contrast, native visionOS apps have an all new visual style. They generally have a translucent “glass” background with light text, keep toolbars in separate floating “ornament” views across the top or bottom, put their tabs into a strip along the side, and have broader spacing between UI elements. These apps not only look fantastic, but also feel so much better than compatible iPad apps with their larger tap targets.
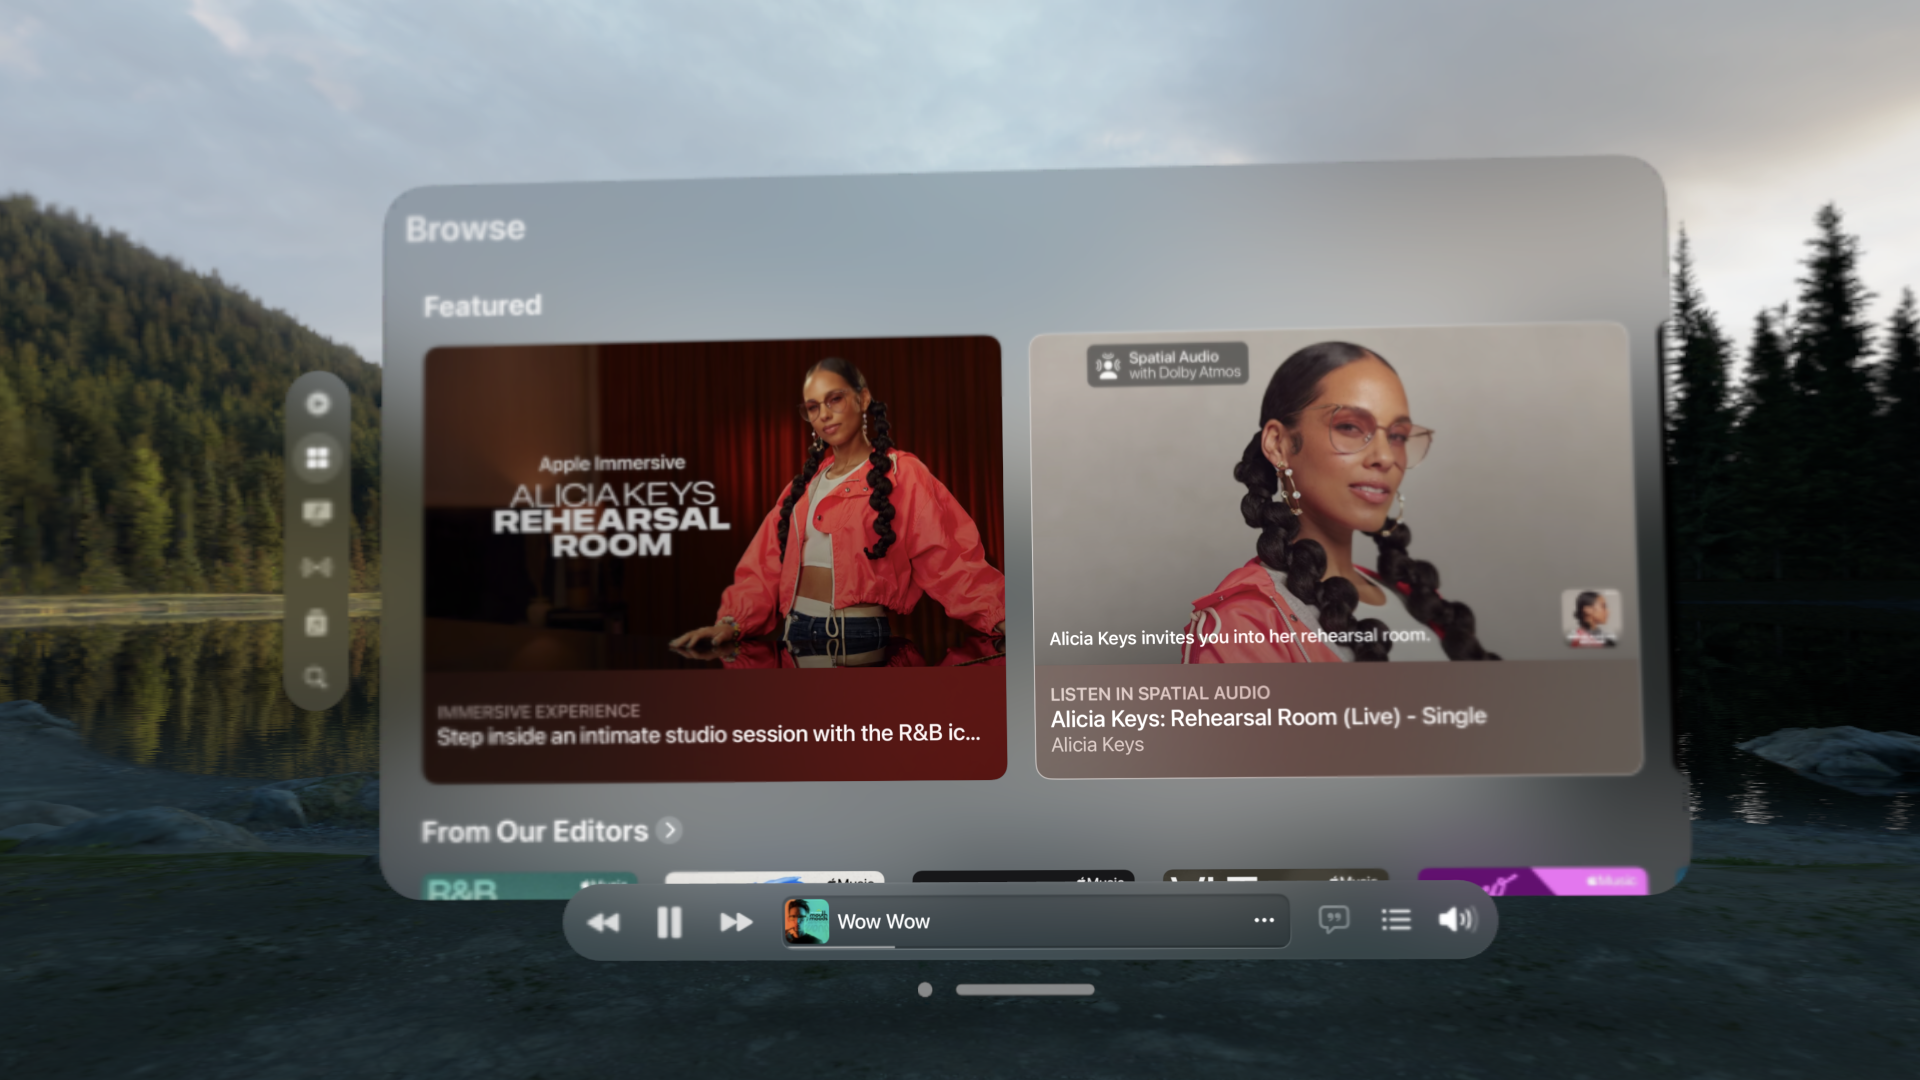
Apple Music is a native visionOS app
On my other devices, I almost always use a “dark mode” when available, putting light text on a dark background. But on visionOS, regardless of app type you’re using though, there is no concept of light or dark mode. This means that you’ll forever be using iOS apps with a bright white background & dark text and visionOS apps with a darker translucent background & light text. Going between these feels quite jarring to me.
I suppose I can understand why, if they are only going to pick one style for compatible apps, Apple would chose light mode as the only visual style. Even as a dark mode user, I still think of light mode as the “canonical” visual style on iOS. But in use it just feels out ofqqq place to me. This was made even clearer to me when I turned on the manual overrides available in apps like Overcast, Ivory, and Discord to use their dark modes anyway. This made those apps immediately feel better to use alongside native apps for me. I really hope Apple reconsiders this design decision in the future.
Overcast in dark mode. So much nicer.
Output Accommodations
Beyond these basics, visionOS also provides many options to adapt its interface to be easier to view, no doubt stemming from its lineage to iOS and iPadOS which have had stellar support in this area for years.
Text Size
Just like on iPhone and iPad, you can set your system-wide text size as big as you want, or even smaller than default if you prefer. This allows me to make sure everything is readable without needing to get as close to windows, which is particularly important in a headset where the focal plane is far enough out that getting too close to virtual objects makes them blurry6.
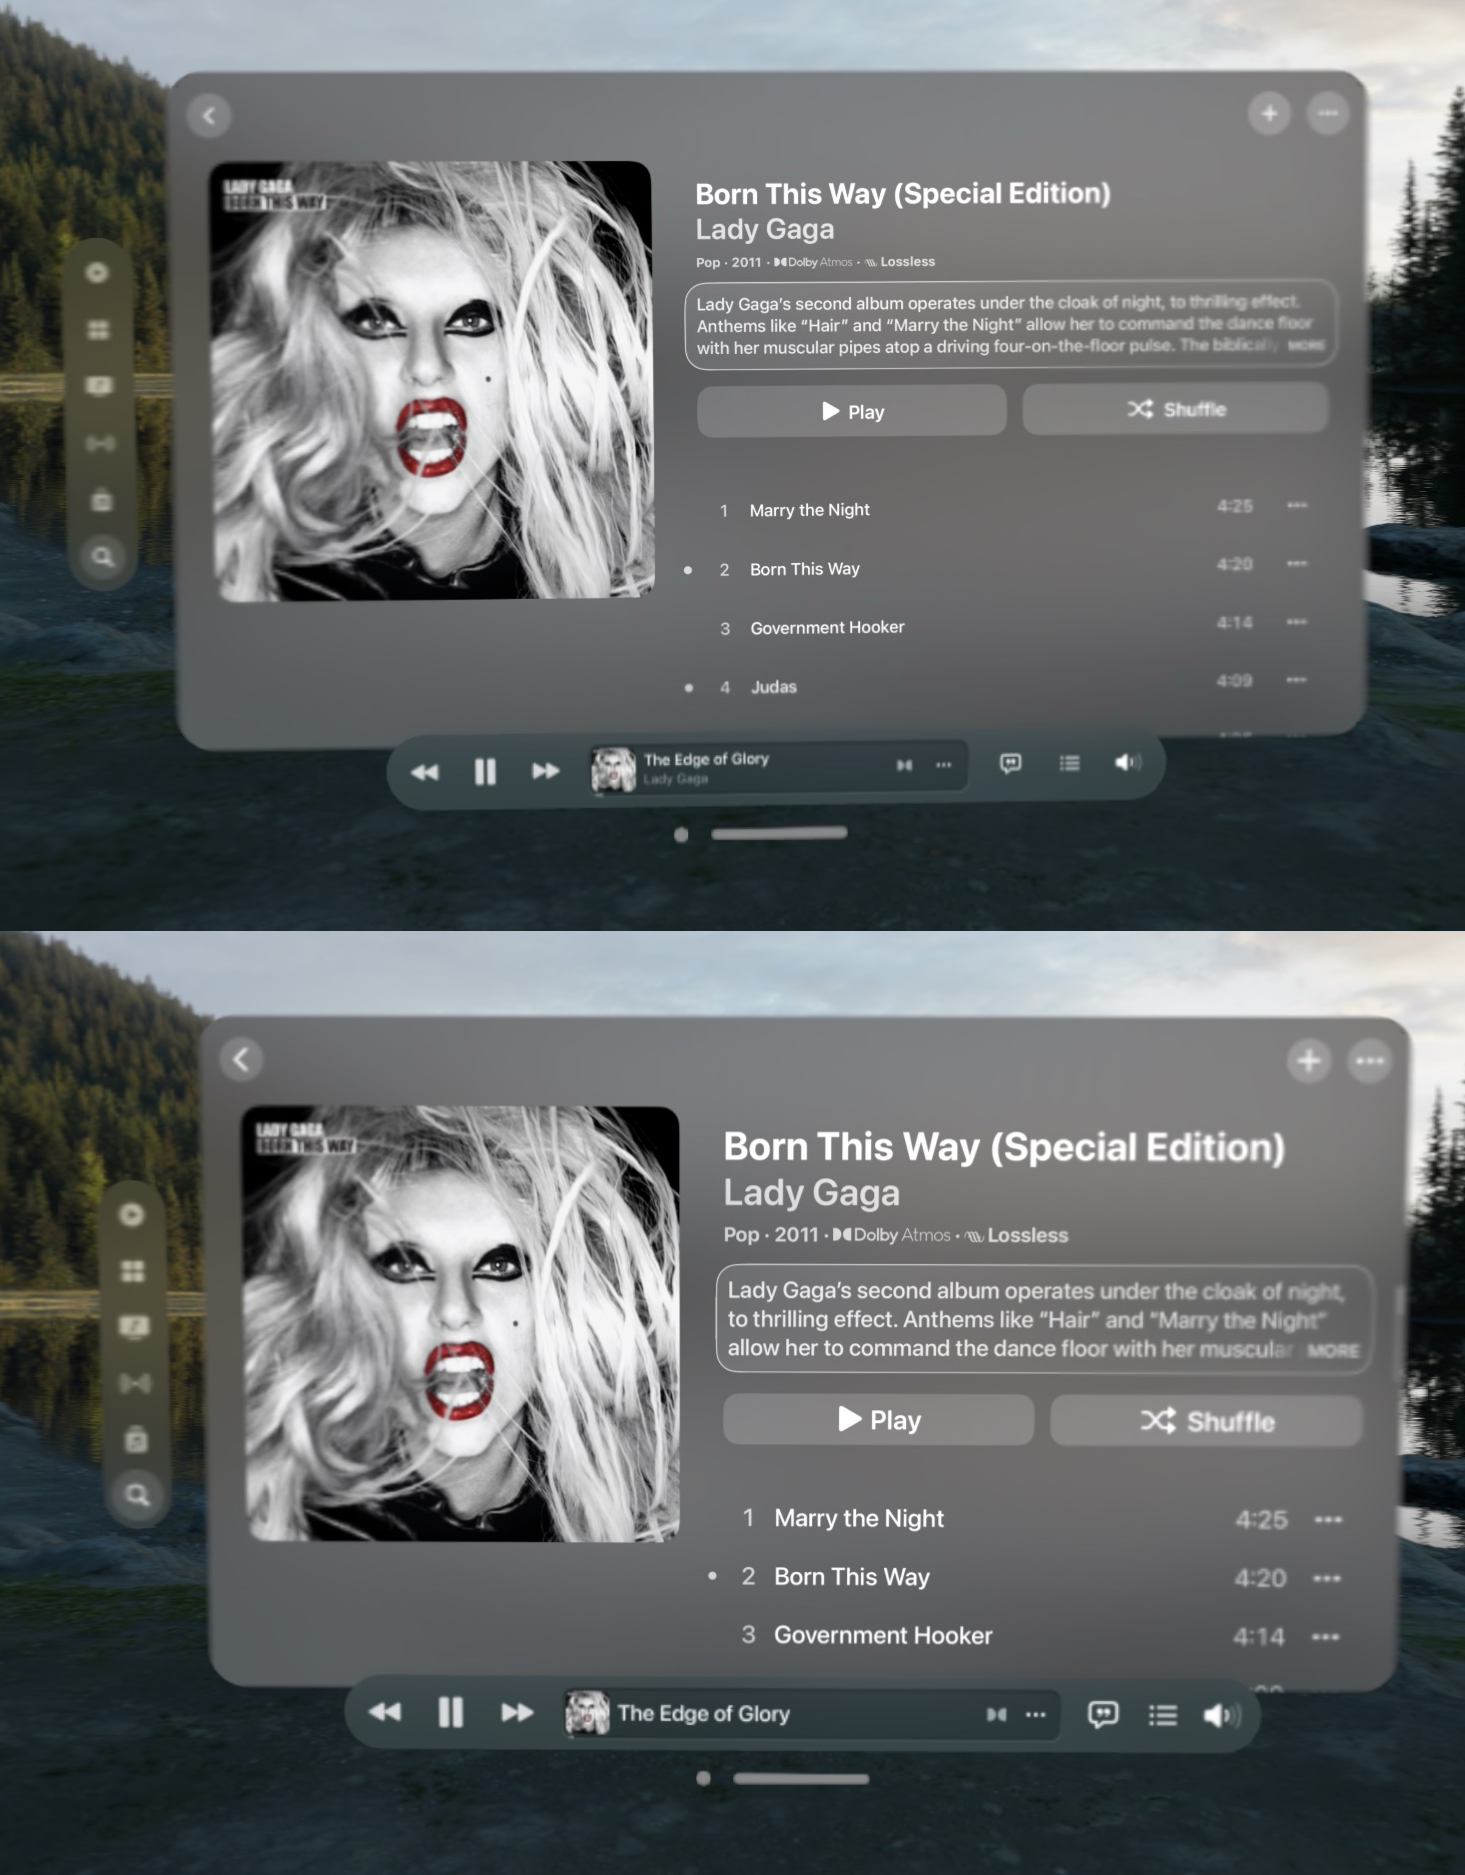
100% vs 150% text size.
visionOS text size stops are at different scales than iOS’ sizes. The steps on iOS from 100% to 150% are 100-110-120-135-150%, while visionOS has steps at 100-105-115-125-130-150%. The largest accessibility text size on Apple Vision Pro is only 200%, while iPhone scales all the way to 310%. I also personally use a higher absolute text size option in Apple Vision Pro then I do my iPhone (Either 130% or 150% on Apple Vision Pro vs 120% on iPhone). Given both of these, I would definitely be wary of recommending this product to anyone who uses one of the larger accessibility text sizes on iPhone or iPad.
In many apps, especially those written with modern APIs like SwiftUI, text size scaling isn’t much of a concern at all. But text being cut off or mismatched in size can definitely be an issue in some apps. This is nothing new, as you can see many of these same issues on iOS with high enough text sizes, but is worth keeping in mind if you’re planning on using a larger text size. I notice these issues in Apple Vision Pro a lot more when using compatible iPad apps.
You can also set text size per app, but, unlike iOS, you can only do this deep within the accessibility section of Settings, not with the Text Size control in Control Center. I would love to see this flow be as easy as on iPhone in the future (FB13629357).
Window Zoom
On iPhone and iPad, you can change the UI scale of all elements of your device’s display using “Display Zoom”. Window Zoom is the same concept, but, due to the nature of the device, only scales digital windows—not your physical space. You can select between four sizes, from small to extra large. I use the extra large size which, while it may mean I can fit fewer windows in my view, makes them much more visible to me.
I find this setting to be much more useful than the equivalent on iPhone and iPad, where I prefer to only change the text size. I think this mainly comes down to how windows feel. A visionOS window is sort of similar to a whole display in physical space. And, much like how I have a 65-inch TV in a space where many other folks may have only gotten a 55-inch, the extra size helps.
You can also enable a setting to allow you to individually scale any window using a two-handed pinch. This feels incredibly sci-fi, and can be helpful if something is just a bit too small for you.
Increase Contrast
To aid in content readability, this setting makes the glass background of visionOS windows darker and more opaque.
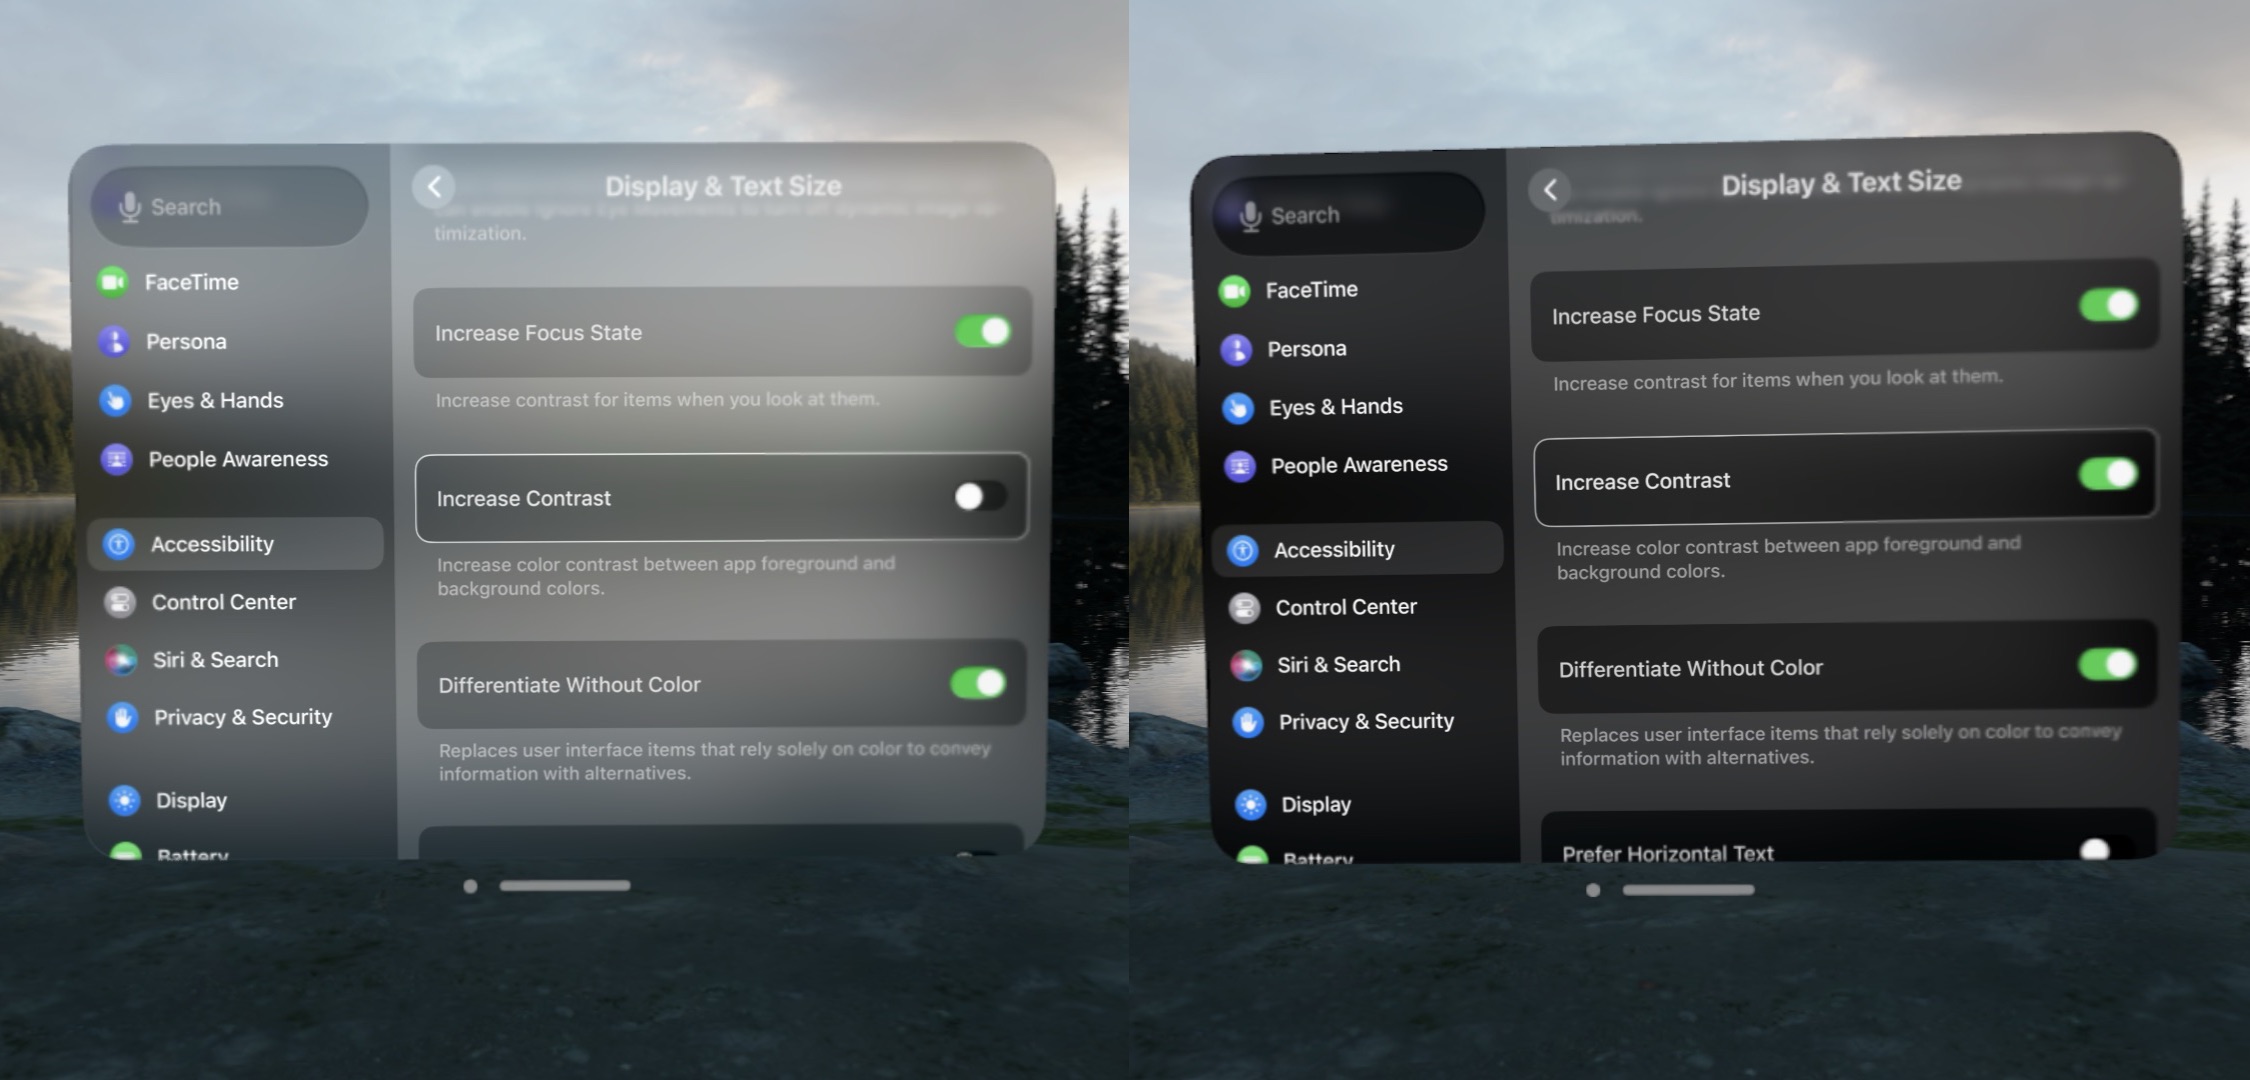
For me, this doesn’t usually make a huge difference, but can be helpful for dark colored text on some backgrounds (particularly red destructive actions in context menus). I tend to leave this off to keep a standard visionOS aesthetic, but I keep it in my Accessibility Shortcut just in case.
Increase Focus State
Much like on tvOS, it can sometimes be a bit hard to tell where your focus is. To accommodate this, you can enable a setting to add a more prominent highlight around the currently focused UI element. This doesn’t show for every UI element in visionOS, but it shows on most buttons, tables, and other controls.
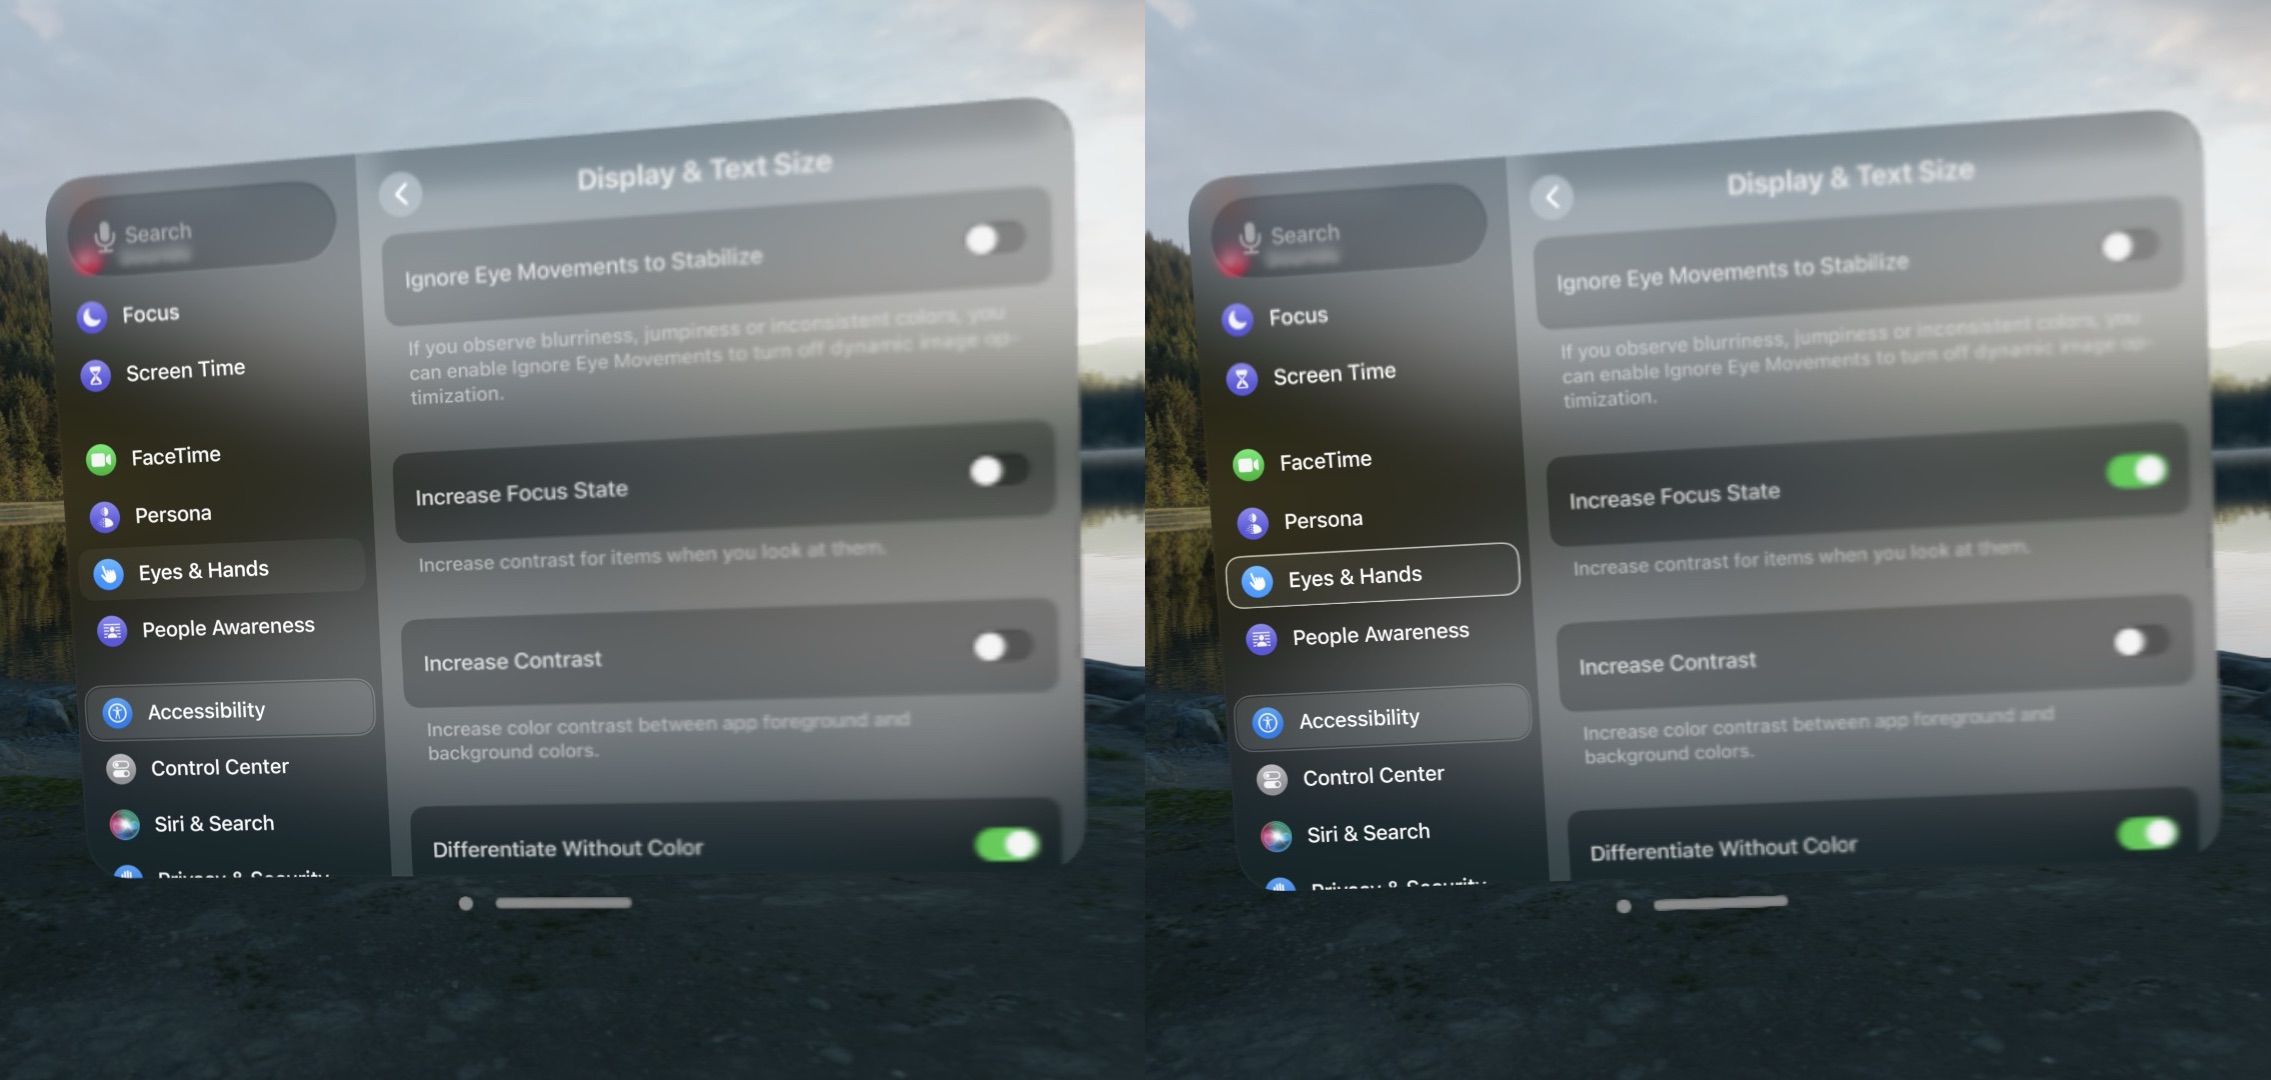
I’m looking at the “Eyes and Hands” option in the left sidebar
This option does have the side effect of making some parts of the interface a fair bit uglier. The virtual keyboard, for example, does not play nice with the focus state highlight at all.
See the bad outline on the backspace key
Zoom
Another classic Mac and iPhone accessibility setting reimagined. Zoom gives you a virtual head-locked magnifying glass7 to view digital content through. You can scale the zoom level using the Digital Crown, or move the window around in your view. This can be useful to view or interact with very small UI elements, particularly in compatible iPad apps.
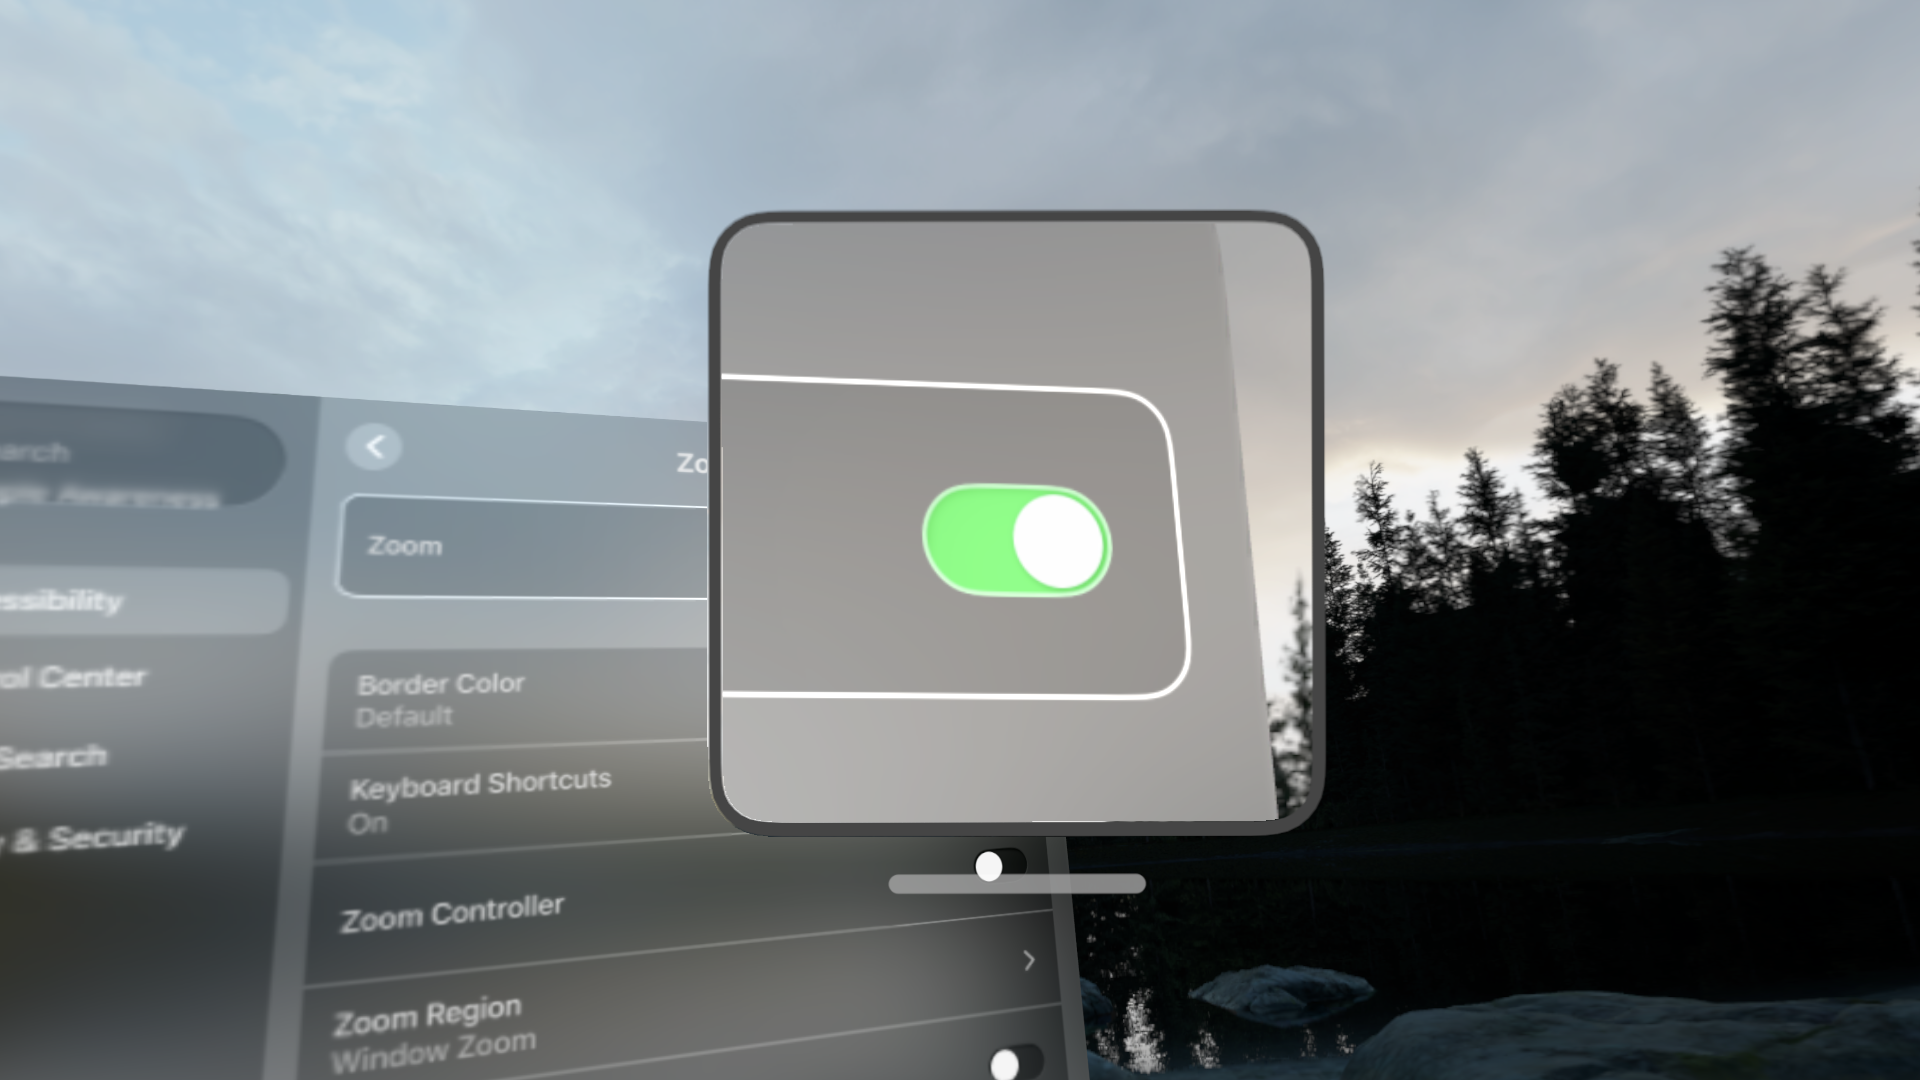
I don’t find myself using zoom on Apple Vision Pro nearly as much as I do on my iPhone or iPad, as there are more opportunities to make the windows themselves larger instead.
One interesting quirk of Zoom is that it only zooms digital content, not passthrough. So you can’t use it as a physical magnifying glass. This feels really strange at first, since the digital windows are otherwise anchored incredibly well in your real world space.
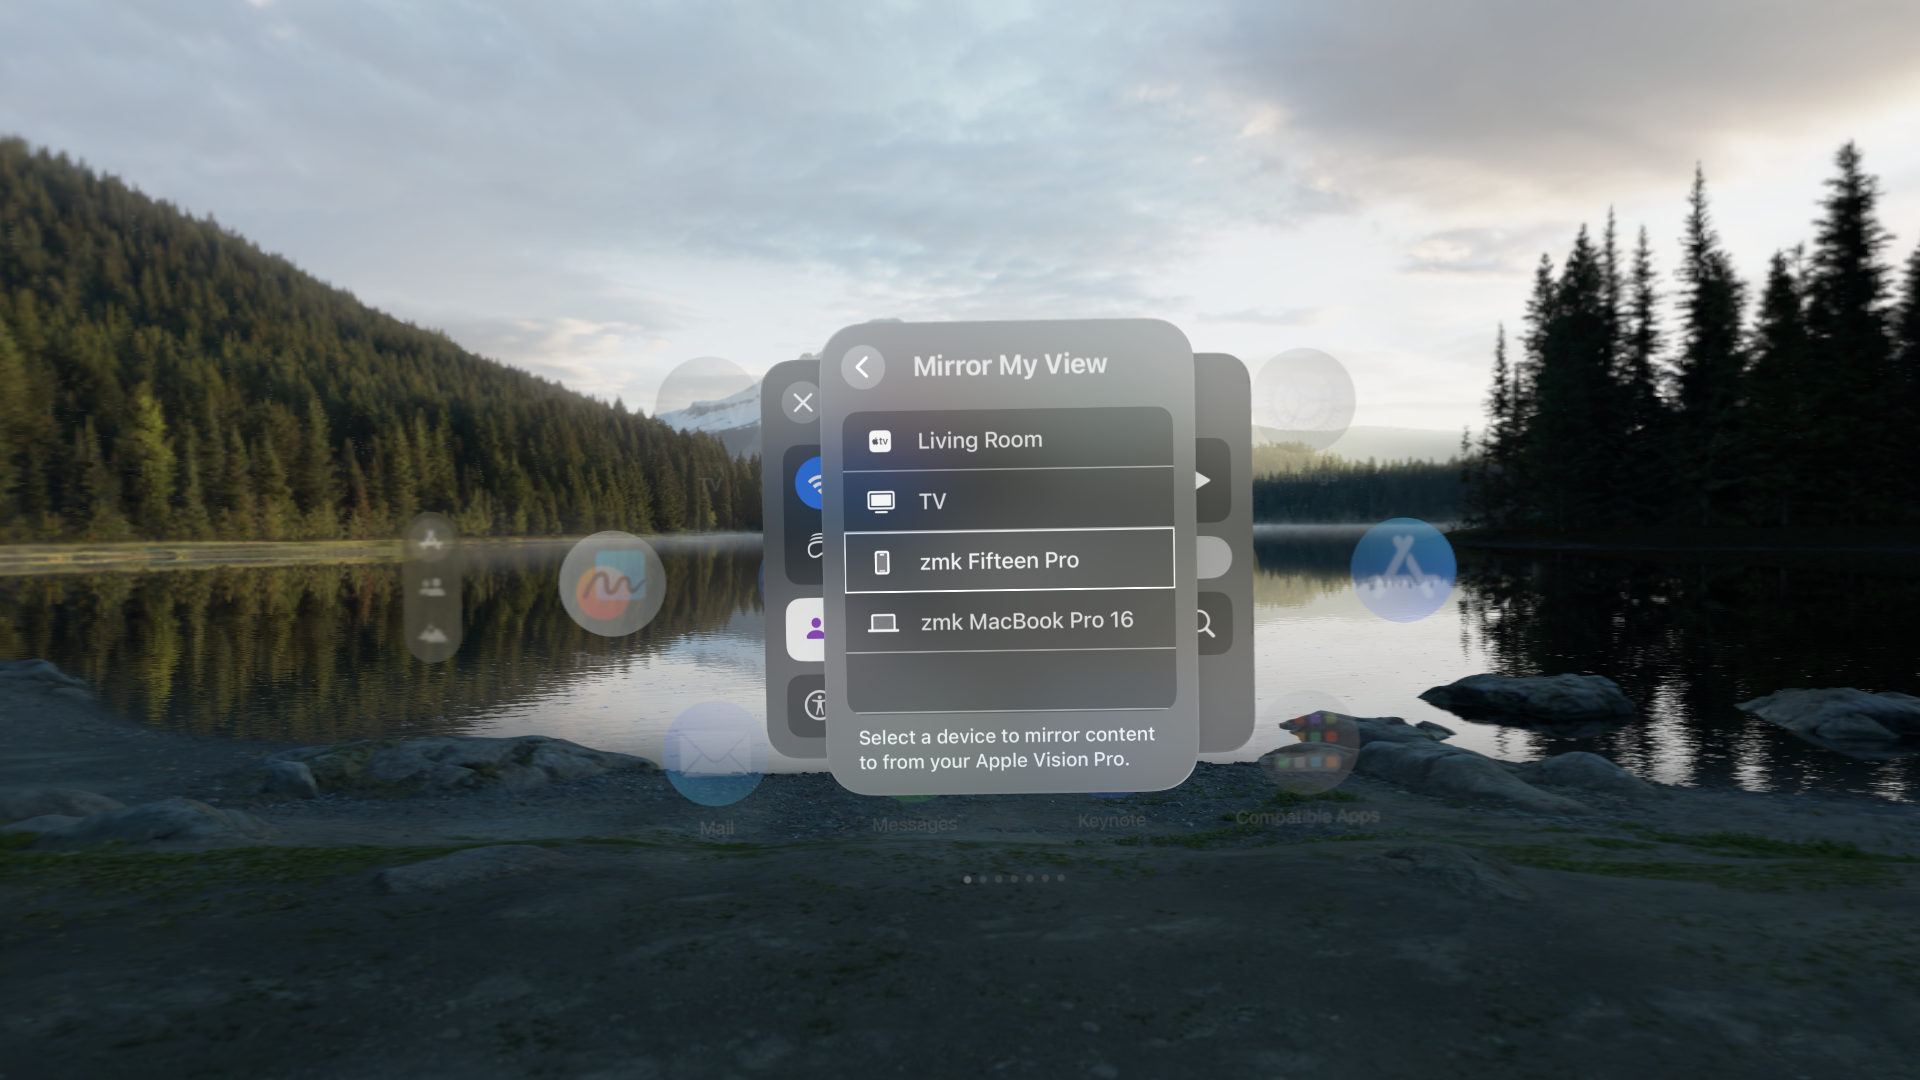
View Mirroring
This is much less relevant for most use of this device, but is still an important output. Apple Vision Pro can mirror a view of what the wearer is seeing to any compatible AirPlay receiver, iPhone, or iPad. This allows you to show others what you’re experiencing. And, while not designed as an accessibility feature, mirroring your view could be helpful if you, as the wearer, need assistance in dealing with the digital content in front of you.
Display Accommodations
Beyond all these options, many of the same settings from iOS remain on visionOS. You can add a color filter to both digital content and passthrough. You can invert colors on all digital content. And you can ask the system to reduce motion. All in all, a very complete accessibility package.
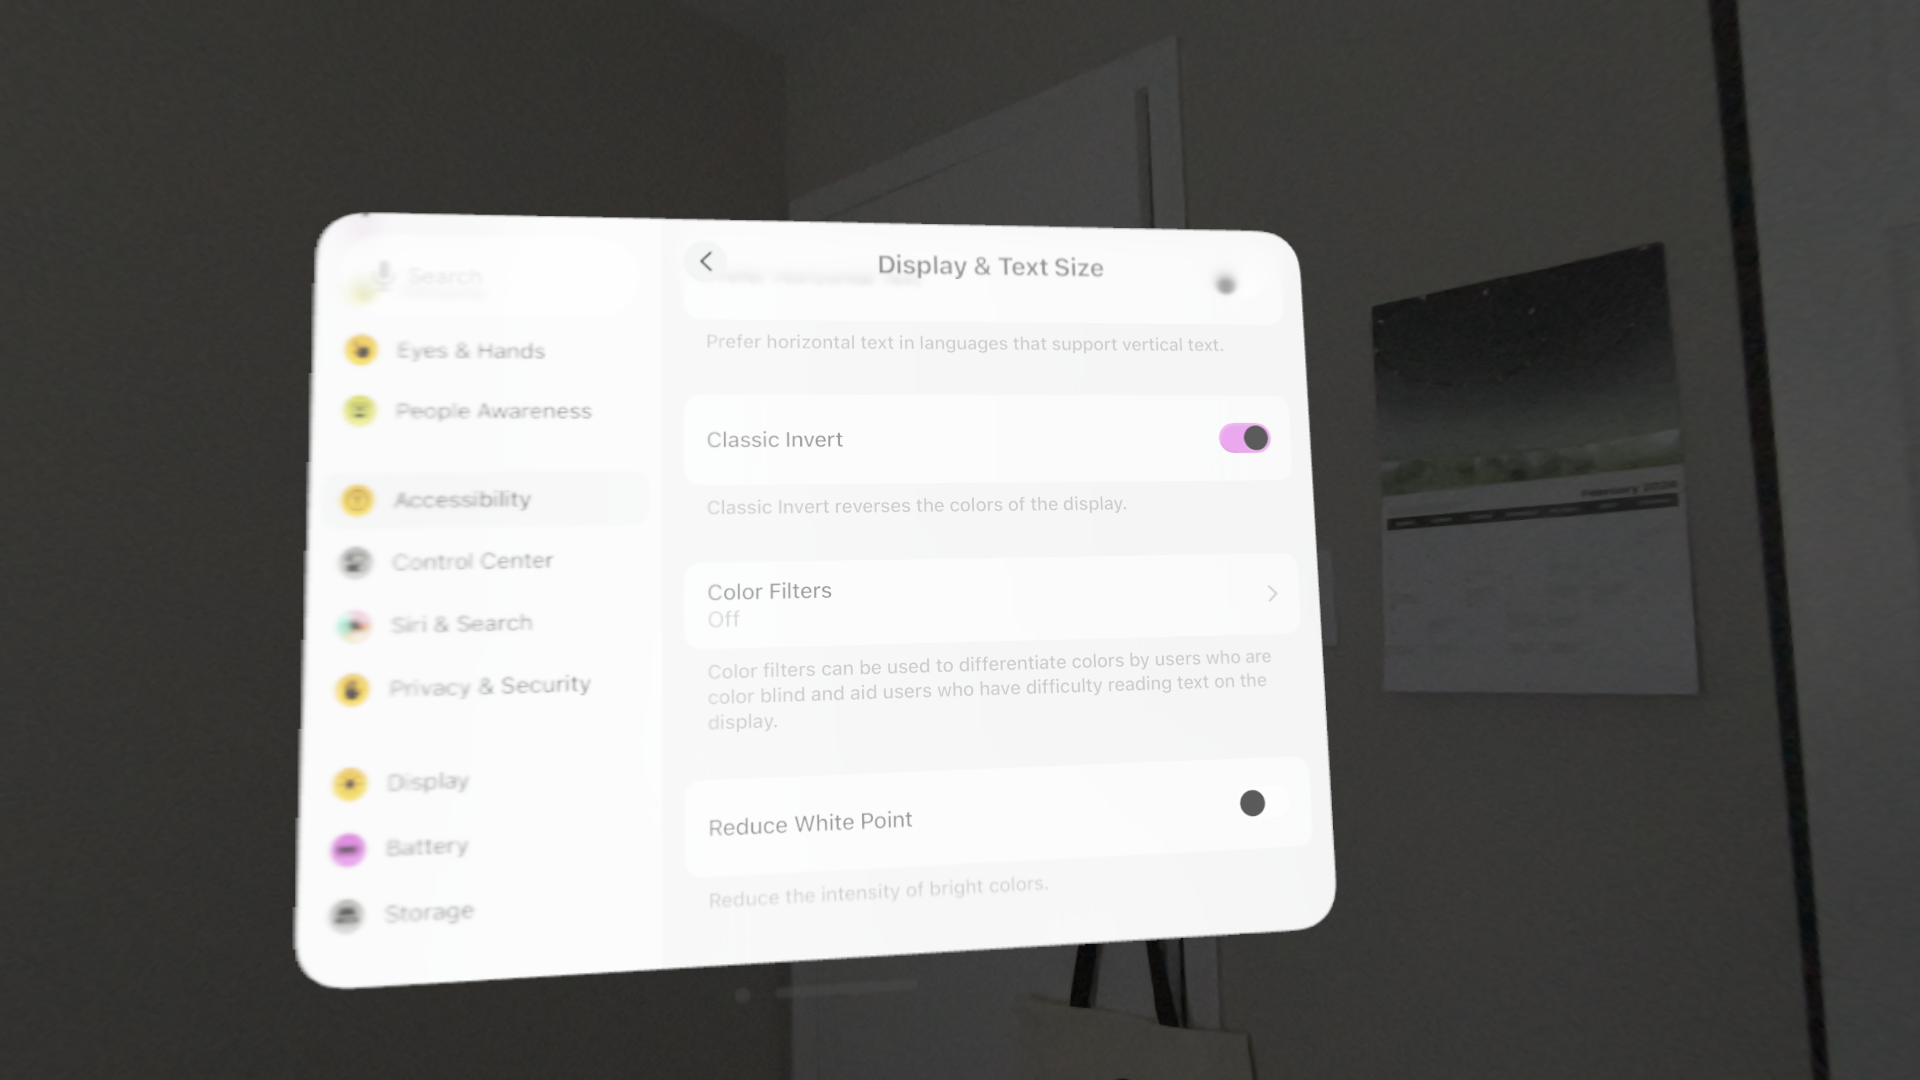
Classic Invert enabled
Does It Work For Me?
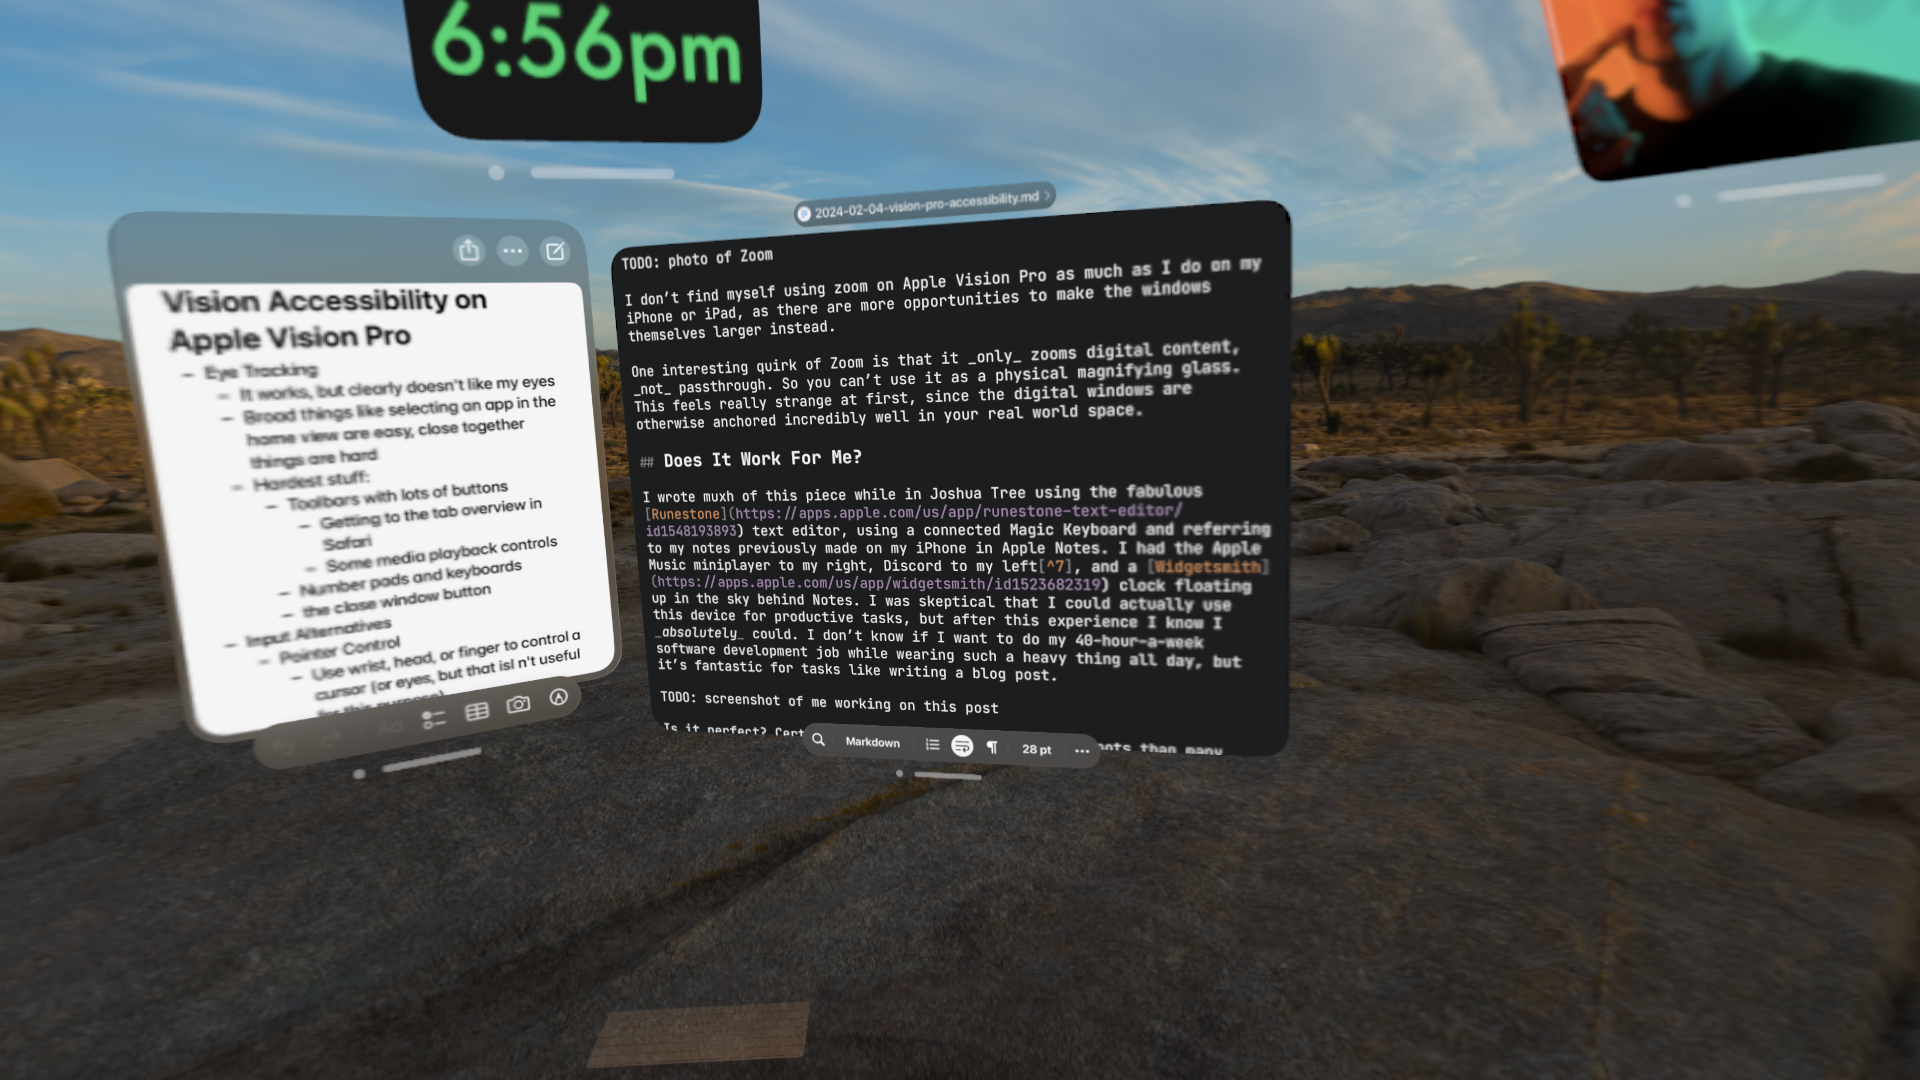
I wrote much of this piece while in Joshua Tree using the fabulous Runestone text editor, using a connected Magic Keyboard and referring to my notes previously made on my iPhone in Apple Notes. I had the Apple Music miniplayer to my right, Discord to my left8, and a Widgetsmith clock floating up in the sky behind Notes. I was skeptical that I could actually use this device for productive tasks, but after this experience I know I absolutely could. I don’t know if I want to do my 40-hour-a-week software development job while wearing such a heavy thing all day, but it’s fantastic for tasks like writing a blog post.
Is it perfect? Certainly not. I hit a lot more rough spots than many other users would. But it didn’t catastrophically break down for me either. And compared to the competition, Apple Vision Pro is vastly more accessible. On Meta Quest, you can change the text size of system apps, but that’s about it. Many games and apps on that platform simply don’t accommodate those who may need larger text or views, and that system doesn’t provide any accommodations to zoom or scale third-party content. Apple Vision Pro not only provides accessibility settings that can affect the content of third-party apps, but also offers additional options to allow users to interact with apps that are still tricky to use despite those accommodations. I’m incredibly impressed with the amount of accessibility functionality they shipped on day one.
So I didn’t return it. I’m very excited to see how this brand new platform9 will evolve over the coming months and years.
Before publishing, I came across this short Mastodon thread from Peter Saathoff-Harshfield describing their own experiences with trying the accessibility features with Apple Vision Pro during an in-store demo which, as they have very different vision disabilities than me, were different from mine. I recommend you check it out if you want another perspective on visionOS accessibility.
-
If you’re curious about the history of Apple’s early accessibility efforts, I highly recommend listening to Shelly Brisbin’s 36 Seconds That Changed Everything documentary about that very topic. ↩
-
My contacts also have a not-super-strong prescription, but I don’t use any optical inserts, as I already go without my contacts many days, mainly when at home, anyway. ↩
-
You can actually control Apple Vision Pro with only your eyes if needed using Dwell Control (an accessibility feature I’m not covering here as it, by design, assumes you have good vision) ↩
-
VoiceOver really falls into both the input and output sections, as it radically changes both. I chose to put it with the “inputs” as that is where VoiceOver felt most different to its counterpart on iOS for me. ↩
-
I also find Voice Control useful when I’m under the covers of a warm blanket and don’t want to take my arm out to tap something on my iPad. Simply tell Siri to turn voice control on and then tell your device what to tap! ↩
-
I find Apple Vision Pro to be better in this regard than Meta Quest 3, allowing you to get a bit closer without issues. But it’s definitely still noticeable. I find that visionOS elements start to get a bit blurry closer than about an arm’s length away from me, though don’t get unusably blurry until you’re a fair bit closer. ↩
-
You can also zoom your entire view of digital content, but I find this fairly disorienting. Making the window the default was the right call. ↩
-
The Discord iPad app on Apple Vision Pro is Not Great. It doesn’t do much at all for highlighting where you’re looking to select, and has issues with the media picker. But I’m still glad it exists so I can keep up with things while wearing the device. ↩
-
I of course followed Apple’s Developer guidelines on how to refer to Apple Vision Pro in this piece 🙃 ↩