Building an Effective Swift Playground
Making the most out of the many quirks and features of playgrounds
Swift Playgrounds for iPad (and Mac!) is a really cool tool. It allows us to build experiences using real iOS APIs directly on iOS, and more importantly allows us to combine interactive experiences, code, and prose into a single composition. It’s primarily used to teach kids to write code, but I could see it easily become a nice way to familiarize more experienced developers with a new API or framework in bite sized chunks.
But there are a lot of pieces to playgrounds, and a lot you need to keep in mind. I’ve built multiple playgrounds as WWDC scholarship applications, and have watched or played with many more. With this, I think I’ve gained some insight into how you can make your playground a really great experience. Here are some of my tips to building an effective playground.
Before I begin, note that this post was updated in February 2020 with Swift Playgrounds 3.2 in mind. I originally wrote it in April of 2019 for Swift Playgrounds 2.2.
Develop in Xcode. Run in Swift Playgrounds on iPad or Mac.
This first tip seems trivial, but I think it’s important. Can you run a basic playground in Xcode? Absolutely. Unless you’re prototyping, however, don’t intend for your playground to run within Xcode. The experience of interacting and modifying a playground in the Swift Playgrounds app is so much more fun and inviting, and the abilities of the Playground Book format offer far more than a basic Xcode playground.
Use Playground Pages
Look at a screenshot of Swift Playgrounds for iPad. What do you see?
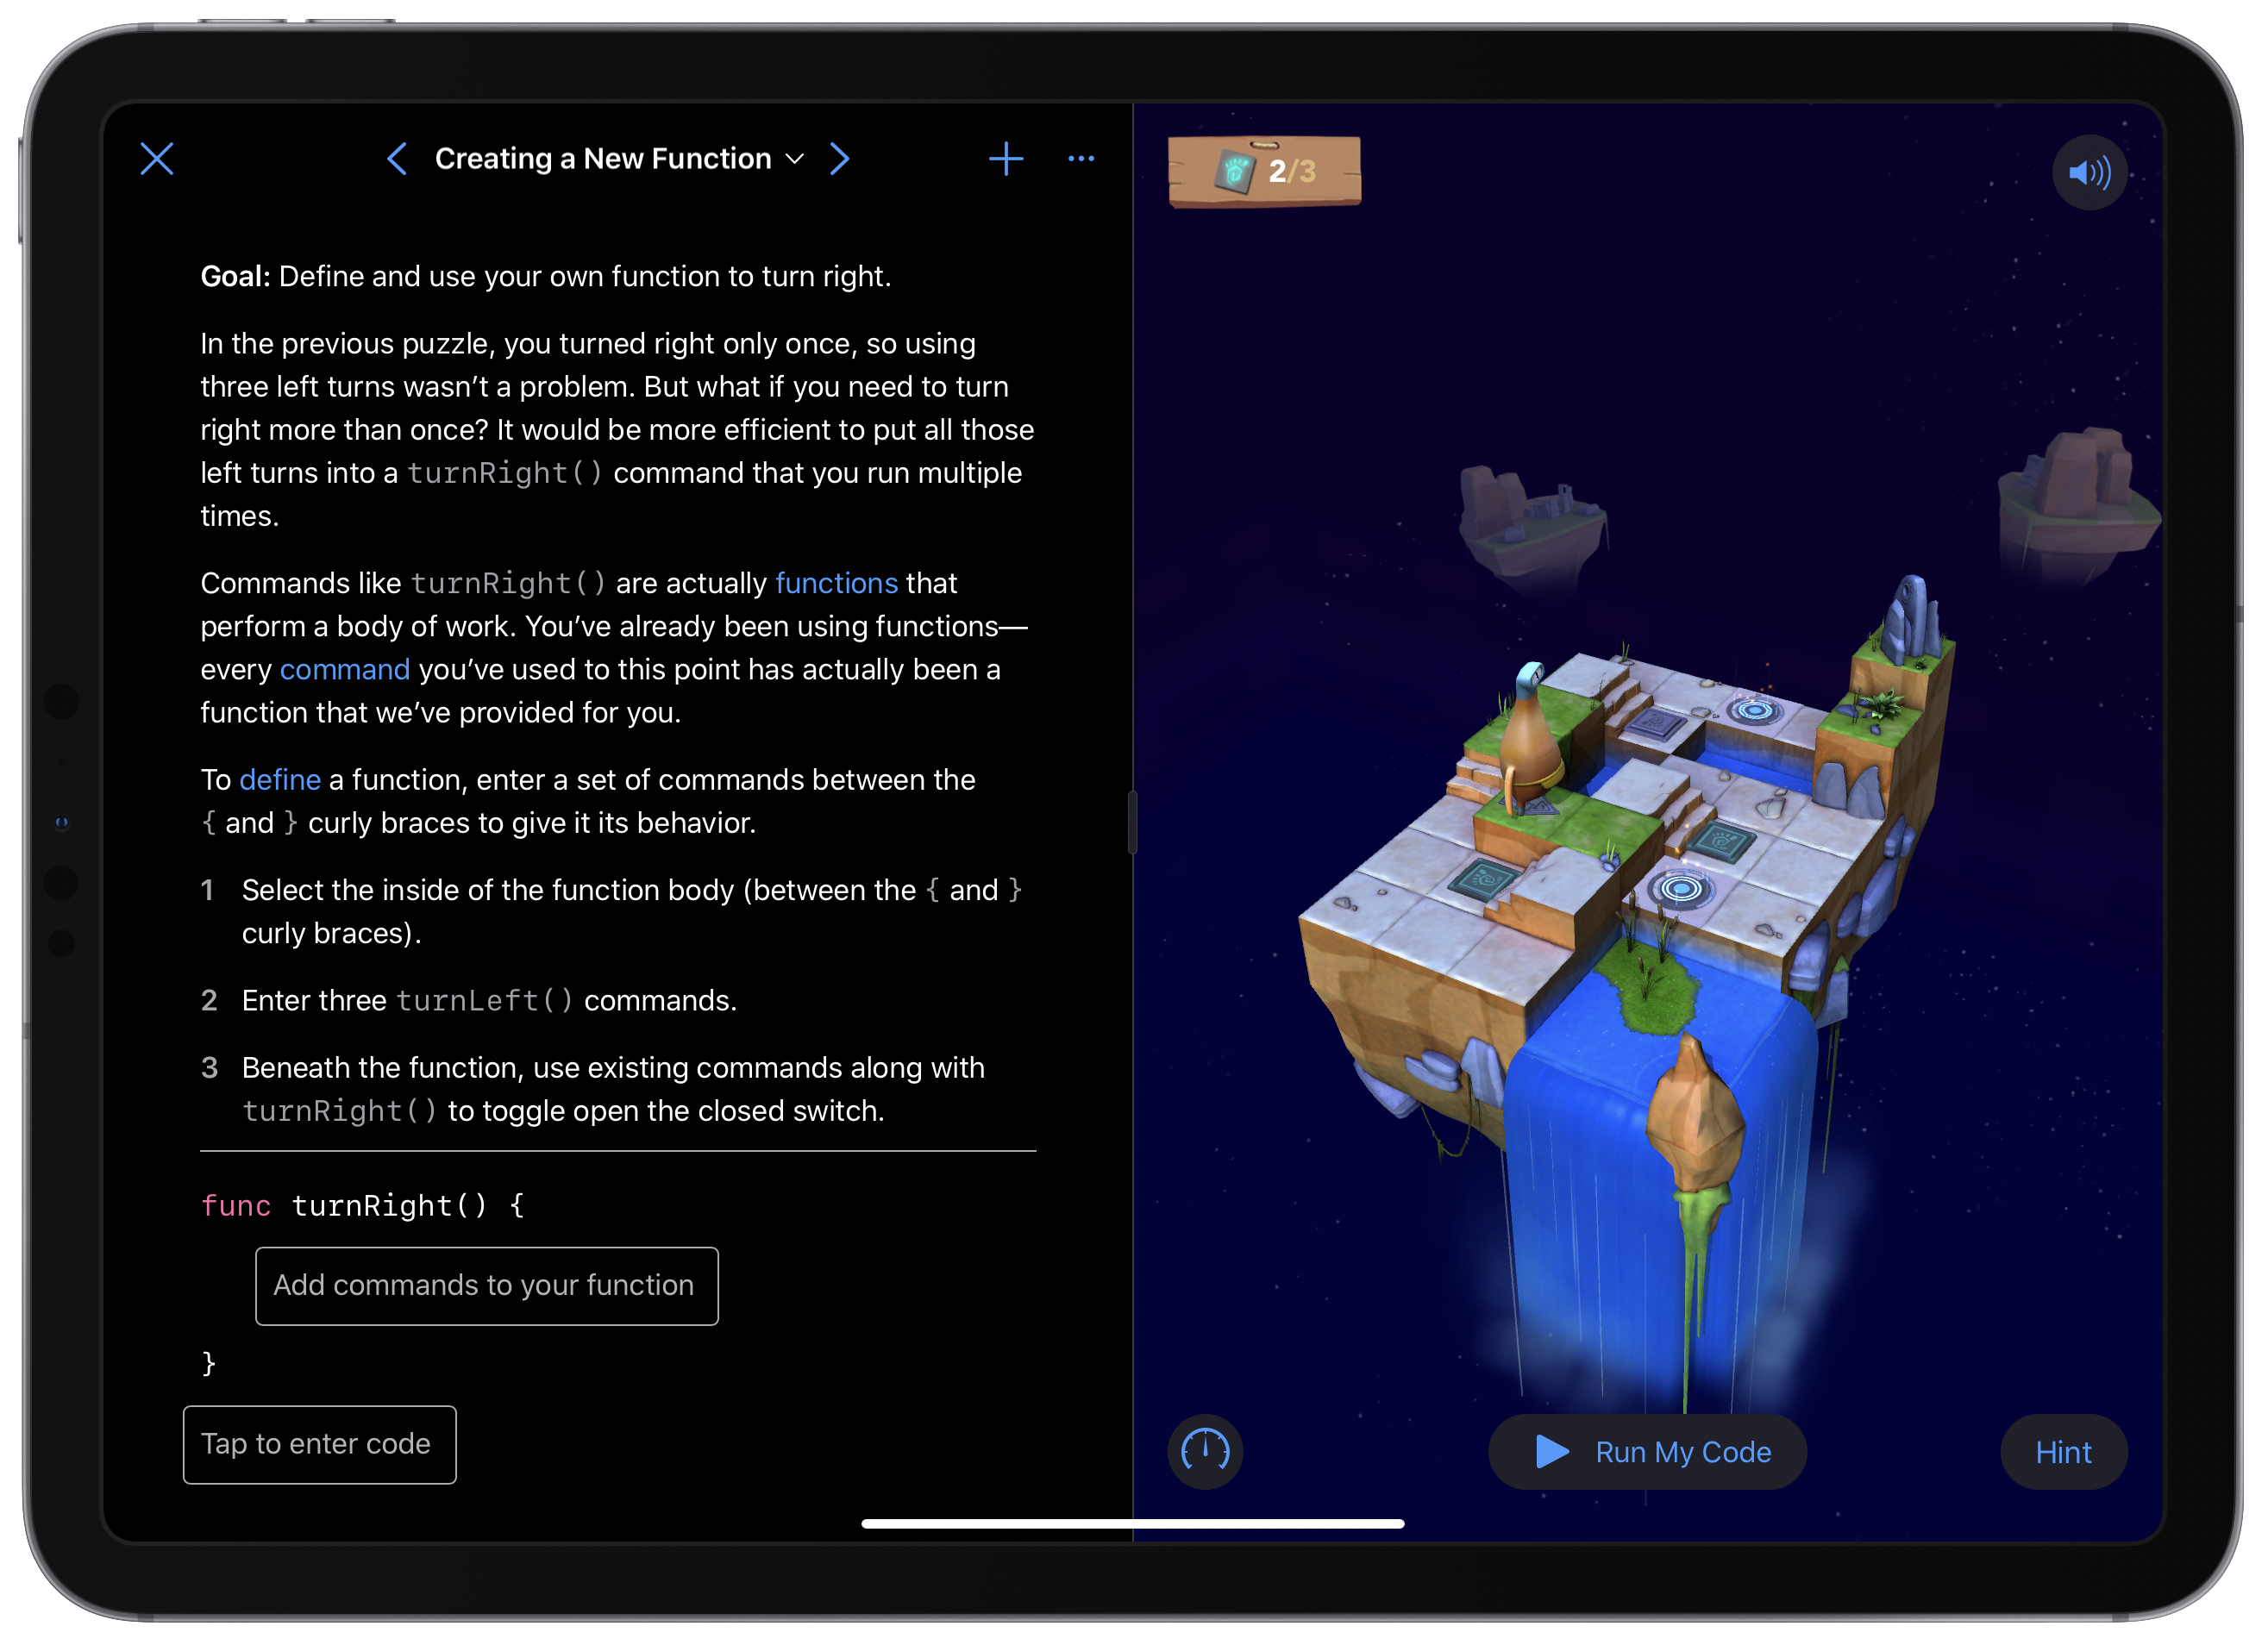
Half of the screen is taken up by this big text and code section! You can shift the live view into full screen, sure, but that’s taking away half of the functionality of a playground.
A playground page can contain a wealth of information. You can add in all sorts of markup to them, letting you add instructions, background info, tutorials, or whatever else you might need to explain to a user. In addition, this is where you can add code to your playground which will run when you tap the “Run My Code” button. This is really great for allowing users a chance to modify a live view’s properties.
Additionally, you can have multiple pages in your playground, which you can even create within the Swift Playgrounds app by pressing the + in the sidebar. On disk, they are represented in the file structure as folders with a name like MyPageName.playgroundpage/, with a Contents.swift file inside to hold the page text (You can also have a LiveView.swift file in your page if you want to instantiate your live view outside of the visible page text). Having additional pages gives you the opportunity to advance through an idea or concept without revealing it all at once. It also allows you the chance to show a difference live view depending on the context of the page at hand.
Here’s an example from my experience: in my 2018 WWDC scholarship submission, I used three pages. The first provided the main premise for the game, the second showed the problem, and the third provided solutions and some code the user could modify. Pages provide a sense of progression, while also only showing a user what they need to see at that moment.
If you want even more separation of tasks in your playground, and are building the file structure of your playground book yourself, you can also organize your pages into chapters. Simply place your MyPageName.playgroundpage/ folders inside a MyPlaygroundChapter.playgroundchapter folder along with a Manifest.plist containing information on your pages. You can find an example of this in Apple’s playground book template (discussed below).
On Markup
Try using a variety of markup options when writing your pages. One of my favorites is the “Experiment” callout, allowing you to add a callout of something that a user can try. Another useful piece is links, as you can link to other pages in your playground! If you want to link to simply the next page, that’s even easier, by simply linking to @next.
Use Modules
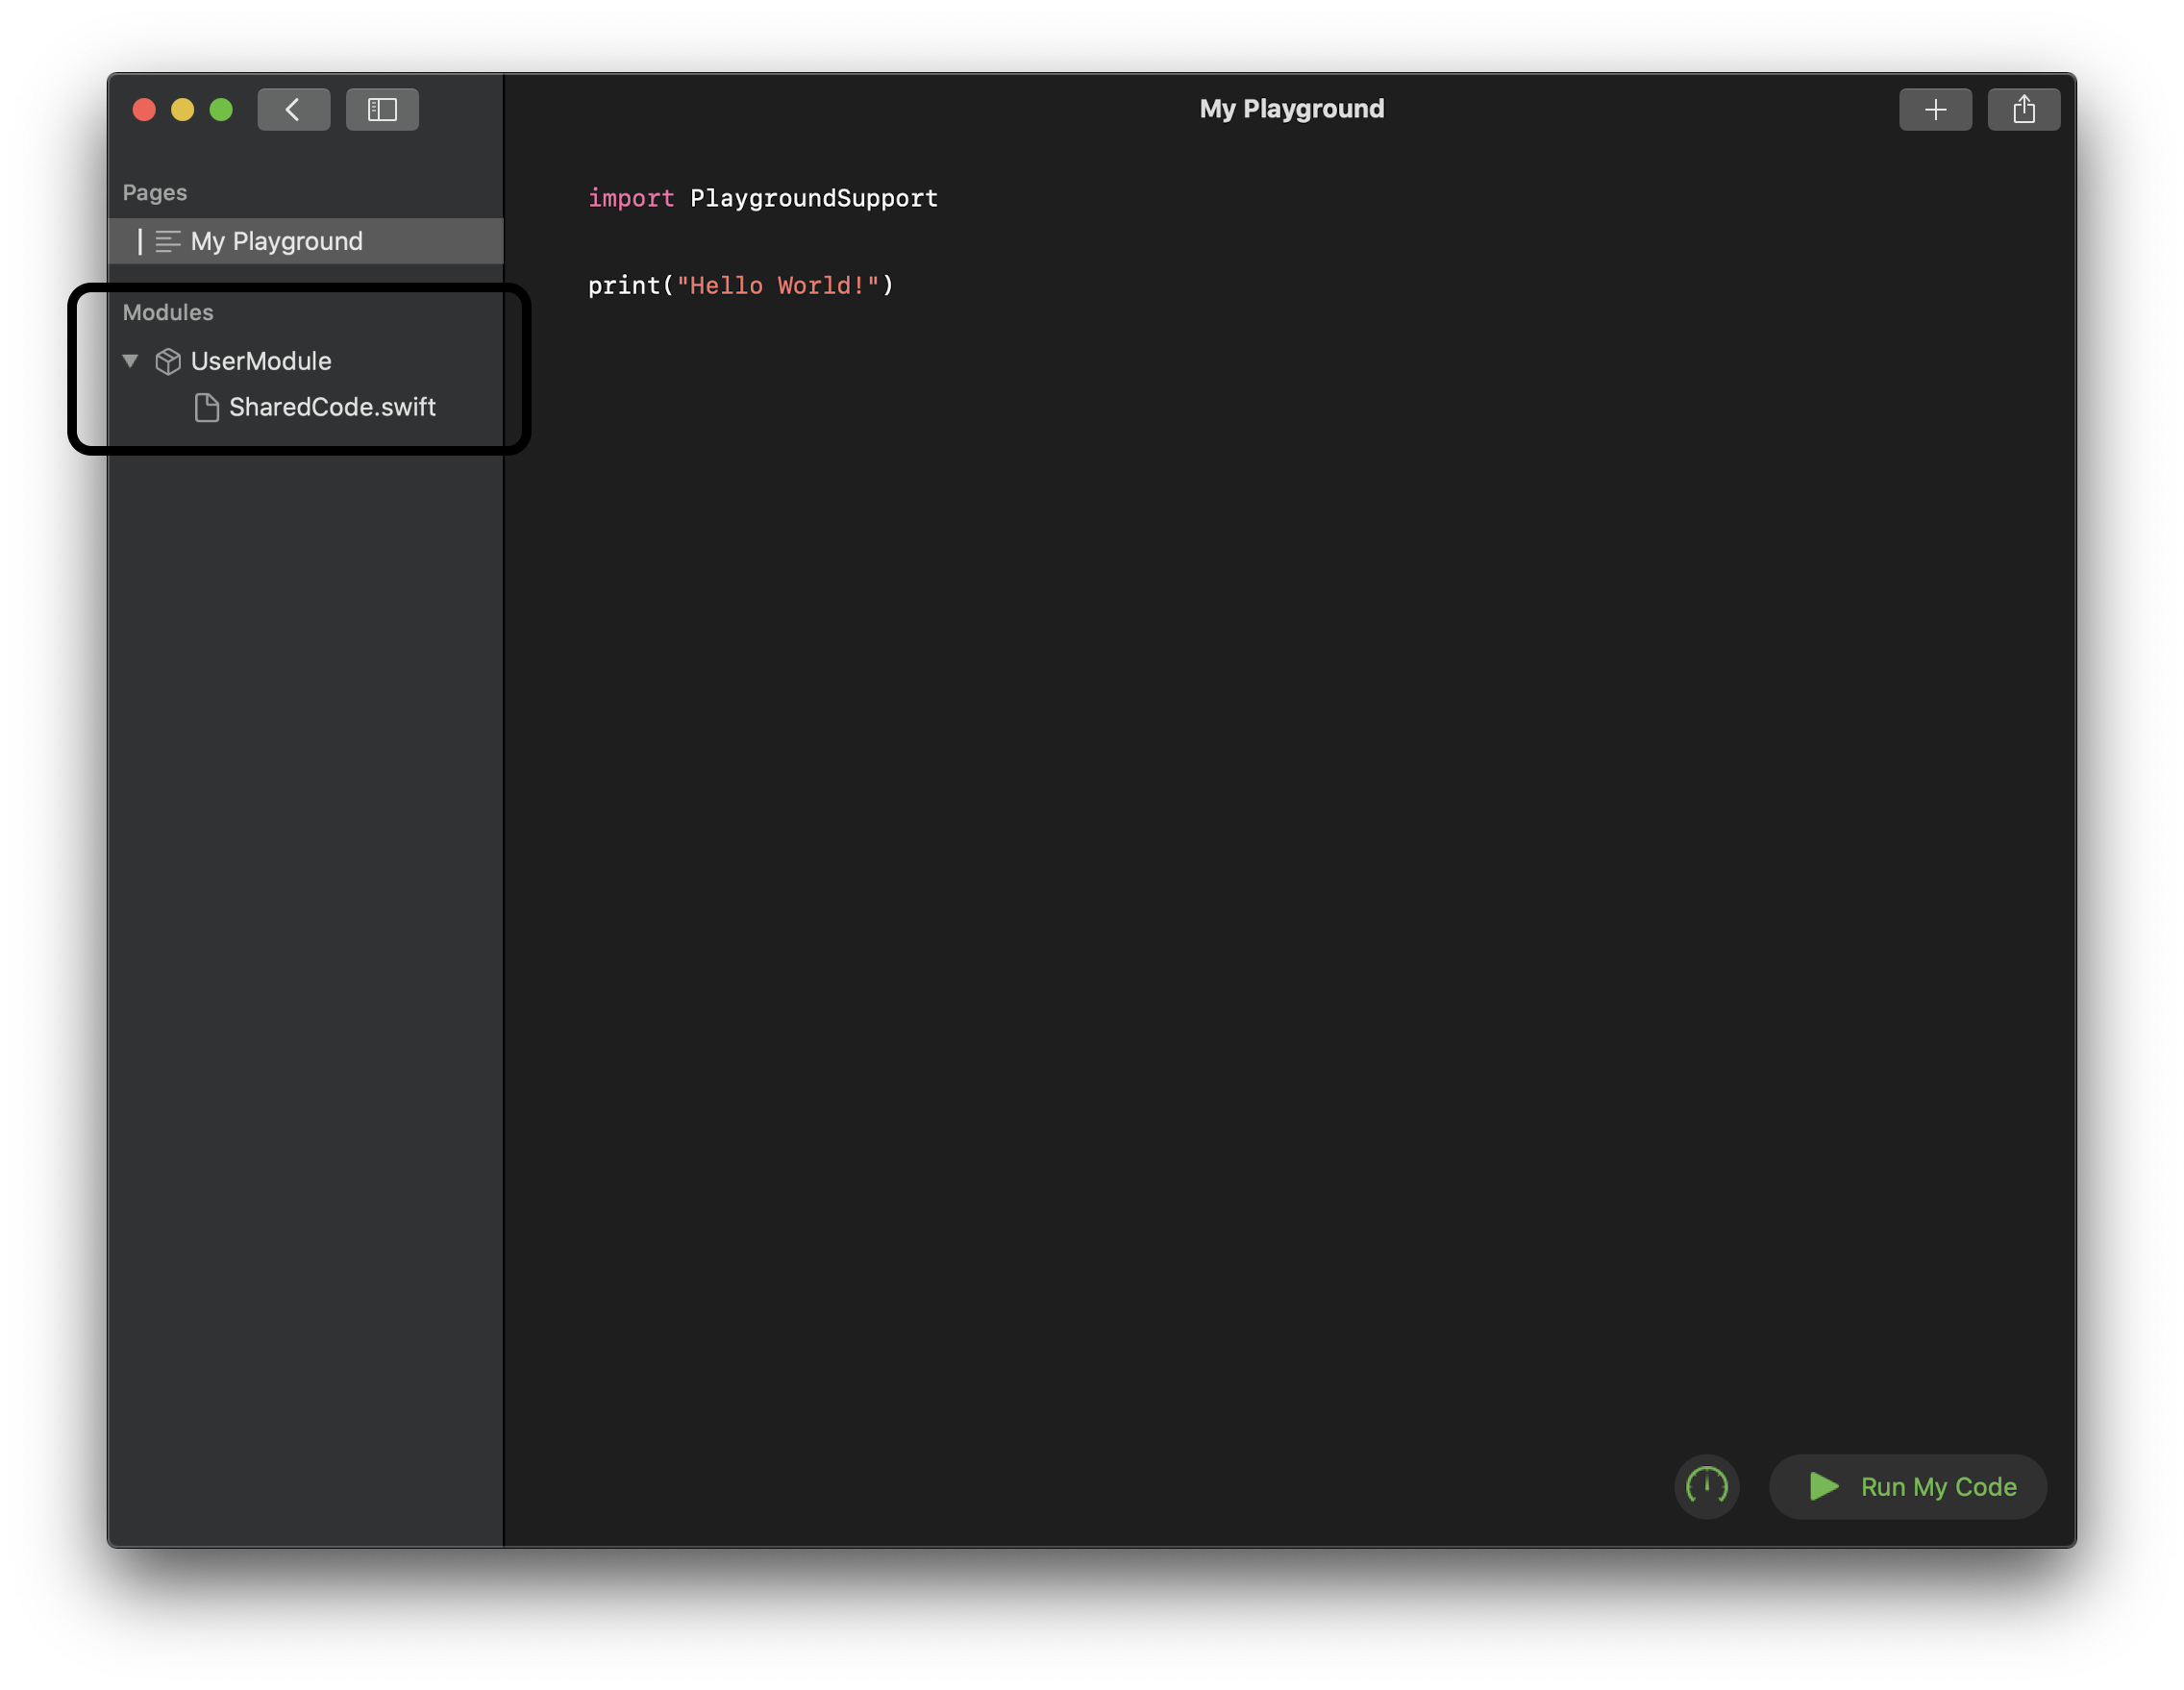
You don’t need to put all of your code in your playground’s pages, and you probably shouldn’t! If you’re building out complex views, data structures, algorithms, or whatever else, you should probably put the bulk of that code into modules. Swift Playgrounds 3 and newer allow you to use modules to separate your code, much like you would with frameworks in an app. This allows you to separate your backend/API code from your primary playground page experiences. This will keep your users focused on the main goals of your experience, while still giving you the ability to write an elaborate backend for them to play with. You can create modules simply by adding modules in the sidebar of the Swift Playgrounds app.
You can put pretty much any Swift file into a module and access it from your pages, so long as classes, variables, and functions are all marked as public. You can build out all sorts of complex code, then provide a simple API to call inside your pages. This can be great when teaching a code concept, as it allows your users to understand the concept without having any extra baggage surrounding it.
The modules you see in the Swift Playgrounds app are considered ‘user-editable modules’ (sometimes known as ‘UserModules’). This means that sny code contained within them can be modified by the user of your playground. This can be useful if you are prototyping an API for yourself, or trying to build an experience around teaching/showcasing more complex development techniques This can be cumbersome, however, if you want to hide implementation details from a user. Luckily, these aren’t the only modules you can use in a playground!
Private modules work exactly like UserModules, but are simply stored in a different folder within your playground book (Contents/Modules instead of Contents/UserModules). Because they’re designed to be inaccessible to a user, you can’t create these in the Swift Playgrounds app itself. You must instead place them into the right folder yourself (or use Apple’s playground book templace, as discussed below).
Modules are only for your code, however. There’s another folder for everything else…
Note: Targeting Swift Playgrounds 2.x and below
Prior to Swift Playgrounds 3, code not stored within pages was stored in a folder named Sources/. This provided many of the same benefits of the modules of today, but you were limited to, in effect, one private module. I would highly reccomend targeting Playgrounds 3 and newer in order to gain the ability to ue multiple modules as well as user-editable modules.
Use the Resources Folders
Have any images, video, sound effects, or music? Have any plist or JSON files you need to read? Have any other static resource you want to use? The resources folders are where all of that goes! You can use PublicResources/ if you want users to use your resources when writing code (such as if they need to select an image), and PrivateResources for anything else. You can access any of the resources in these as you would a file in the target of an iOS app. This provides an easy, no-fuss place to put anything you need to use in your playground that isn’t code.
Additionally: If you only want resources to be accessible within certain parts of your playground, you can create your resources folders in that section, such as within your .playgroundpage/ or .playgroundchapter/ folders.
Note: In a basic .playground created in Xcode, resources are kept in a single folder called Resources/.
Storyboards, Asset Catalogs, and more
Want to use a storyboard to build your user interface? Or an Asset Catalog to keep all your image assets? I’ve got good news and bad news. You can use them, but they first need to be compiled into .storyboardc and .car files respectively. The former can be done with ibtool in your terminal. The latter is a bit more involved. Luckily, Apple did the hard work for you with their Playground Book template.
Take Advantage of the Playground Book Format
The Swift Playgrounds app actually supports two formats. A basic .playground bundle is quite simple, simply containing your pages, basic sources, and resources (this is what is created when you create s ‘New Playground’ in Xcode). A .playgroundbook, however, provides a lot more customization into how all of that content is presented. (I’ve actually already covered a few of these more advanced features, like page chapters and private modules).
The core of a playground book is its Manifest.plist file, containing configuration information describing how to structure your playground. For example: you can give your playground book an image that is shown in the Swift Playgrounds app’s selection view. Check out Apple’s documentation on playground books to see what all is available.
Important note: Playground books are only supported in the Swift Playgrounds app for iPad and Mac, you cannot simply run them inside Xcode. There is, however, a great way to build them in Xcode provided by Apple.
Apple’s Playground Book Template
Apple provides a truly great template for building a playground book. It provides an area for you to write your backend modules (both user-editable and private), a place for your resources, and a starter chapter with a page for future expansion. This template takes care of compiling all of these files into one .playgroundbook bundle, while also bringing a lot of convienence to the developer.
This template also includes a LiveViewTestApp target, allowing you to iterate on your live view rapidly in app form, without having to constantly copy your playground book to your iPad or into Swift Playgrounds for Mac.
But my favorite part about this template is that it will compile your storyboards and asset catalogs for you! You can work with them almost exactly as you would when building a normal app, and it all just works. The only thing to take note of is that you must clean your build folder (Product menu > Clean Build Folder) whenever you modify those resource files.
Note: You may need to use an older Xcode release
Apple’s Playground Book template isn’t updated as frequently as Swift and Xcode are, and the bundled framework binaries are (currently) locked to a specific Swift version. Until Apple resolves this, you may need to use this template with an older version of Xcode, which you can download on Apple’s developer website. As of this writing, you will need Xcode 11.1.
Use Cutscenes for Showing Without Interactivity
If you want to show something to a user without having interactive code and a live view, such as for introducing or defining a concept, you can use cutscenes. Cutscenes are treated like special pages within a chapter of a playground book, and are stored in a .cutscenepage folder. You can create a cutscene using any HTML, CSS, JavaScript, or SVGs you’d like, and can even include video! Check out Apple’s cutscene documentation if you want to learn more.
Focus Your Live Views on One Task
Your live view is supposed to be a contained experience directly relevant to a playground page (we’ll discuss pages later). Your live view is not an app. You don’t need to have a title screen in there, or a credits screen, or a big about box. Or even a bunch of instructions. When your live view starts, it should be immediately ready to be played with. The one exception I can think of is a game where enemies start appearing immediately, in which case you may just need a “tap to begin”—or you may just want to disable the live view from auto-starting. Any of that explanation text can be in a page’s markup.
Ideally, your live view will be just that—one view. Keeping each live view small and bite sized really helps to guide the experience, and keep the pace moving. If you have any pushed or presented views, try to keep them small or quick, as to not distract from the overall experience. Want to show more? Add more pages with different or modified live views!
Conform to PlaygroundLiveViewSafeAreaContainer
You should conform your view to the PlaygroundLiveViewSafeAreaContainer protocol. Doing this gives you a layout guide which keeps the buttons shows by the Swift Playgrounds app in mind. You can use this to make sure your interface isn’t hidden underneath those buttons (like the “Run My Code” button).
Of note: I’ve found that in practice this doesn’t provide me with a useful layout guide in views I push on top of my primary view controller, but your mileage may vary.
Sidenote: Detecting Device Orientation Isn’t Fun
Does your playground rely on knowing the orientation of the iPad to work right, such as if you’re showing a camera view that needs to be right-side up? I’ve got bad news for you. when you try getting the device orientation from UIDevice.current.orientation, you’ll always get a .unknown value. This is not helpful. In fact, this almost killed my WWDC19 scholarship submission. But all hope is not lost.
iOS does actually provide a second way to get the orientation, sort of. The interfaceOrientation property ot UIViewController will actually give us a useful value—but the API was deprecated in iOS 8. This is not ideal, but it does give you a way to, at least as of now (and probably not for long), get an orientation value. It is important to note, however, that left and right are opposite of what you might expect here, as it is returning the orientation of the interface, and not of the device.
Remember: You’re Not Making an App
There is so much more to playgrounds than just a weird way to show some view controller. Make the most of it! Putting all of these pieces together can make for a much richer experience, and provide a user with greater enjoyment when using your playground. Use pages to describe your live view, and to let your users change what it shows. Use cutscenes to help set the tone, without distracting the user. And of course, use the live view to add a cool interactive experience to tie it all together.
I hope you found some of these tips helpful, and can use them to better your playgrounds in the future!